

272144 Vanguard Twin Cylinder OHV BRIGGS & STRATTON.pdf
272144 Vanguard Twin Cylinder OHV BRIGGS & STRATTON.pdf
272144 Vanguard Twin Cylinder OHV BRIGGS & STRATTON.pdf

You also want an ePaper? Increase the reach of your titles
YUMPU automatically turns print PDFs into web optimized ePapers that Google loves.
<strong>Cylinder</strong> Leakdown Test<br />
Use a leakdown tester to test the sealing capability<br />
of each cylinder. Follow the instructions for the leakdown<br />
tester you are using to determine the likely<br />
problem area(s).<br />
<br />
1. Run engine for 5 minutes allowing engine to<br />
reach operating temperature.<br />
NOTE: If the engine is cold or cannot be started, air<br />
flow may be higher (gauge readings lower)<br />
because compression components are not<br />
at normal operating temperatures.<br />
2. Remove spark plug from engine. Disconnect<br />
crankcase breather tube.<br />
3. Rotate crankshaft in direction of operation until<br />
piston is at Top Dead Center (TDC) of the compression<br />
stroke.<br />
4. Hold flywheel nut with socket and breaker bar.<br />
NOTE: Hold the crankshaft with the piston at TDC<br />
to minimize the chance of rotation.<br />
CAUTION<br />
AVOID INJURY!<br />
• Injury could occur if the crankshaft is<br />
allowed to rotate or if the engine is not<br />
securely fastened to a stand or to the<br />
application.<br />
5. Connect tester to a shop air source with<br />
minimum air pressure of 70 psi (480 kPa).<br />
6. Install outlet hose into spark plug hole of cylinder<br />
being tested. Insure O-ring is seated to prevent<br />
air leak at spark plug hole. Connect other end to<br />
tester.<br />
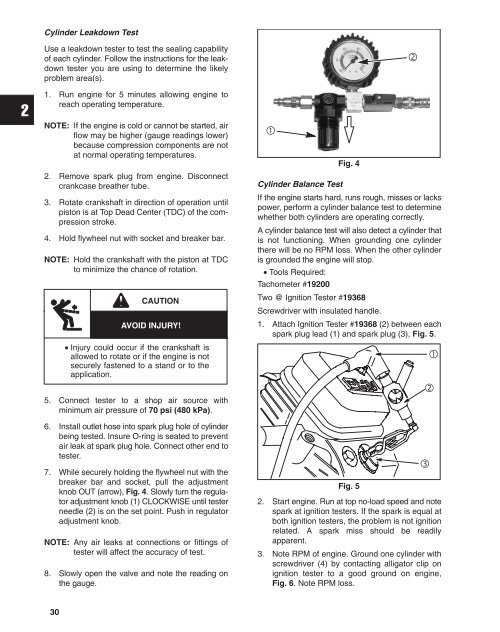
7. While securely holding the flywheel nut with the<br />
breaker bar and socket, pull the adjustment<br />
knob OUT (arrow), Fig. 4. Slowly turn the regulator<br />
adjustment knob (1) CLOCKWISE until tester<br />
needle (2) is on the set point. Push in regulator<br />
adjustment knob.<br />
NOTE: Any air leaks at connections or fittings of<br />
tester will affect the accuracy of test.<br />
8. Slowly open the valve and note the reading on<br />
the gauge.<br />
<br />
Fig. 4<br />
<strong>Cylinder</strong> Balance Test<br />
If the engine starts hard, runs rough, misses or lacks<br />
power, perform a cylinder balance test to determine<br />
whether both cylinders are operating correctly.<br />
A cylinder balance test will also detect a cylinder that<br />
is not functioning. When grounding one cylinder<br />
there will be no RPM loss. When the other cylinder<br />
is grounded the engine will stop.<br />
• Tools Required:<br />
Tachometer #19200<br />
Two @ Ignition Tester #19368<br />
Screwdriver with insulated handle.<br />
1. Attach Ignition Tester #19368 (2) between each<br />
spark plug lead (1) and spark plug (3), Fig. 5.<br />
Fig. 5<br />
<br />
<br />
<br />
2. Start engine. Run at top no-load speed and note<br />
spark at ignition testers. If the spark is equal at<br />
both ignition testers, the problem is not ignition<br />
related. A spark miss should be readily<br />
apparent.<br />
3. Note RPM of engine. Ground one cylinder with<br />
screwdriver (4) by contacting alligator clip on<br />
ignition tester to a good ground on engine,<br />
Fig. 6. Note RPM loss.<br />
30


