AED 10 User Manual - Welch Allyn
AED 10 User Manual - Welch Allyn
AED 10 User Manual - Welch Allyn

Create successful ePaper yourself
Turn your PDF publications into a flip-book with our unique Google optimized e-Paper software.
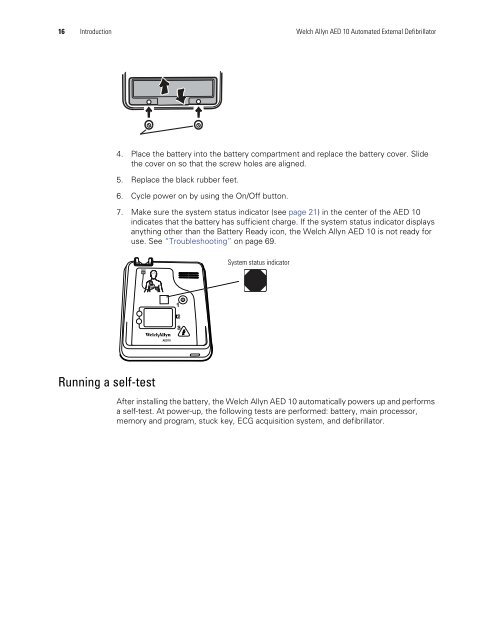
16 Introduction <strong>Welch</strong> <strong>Allyn</strong> <strong>AED</strong> <strong>10</strong> Automated External Defibrillator4. Place the battery into the battery compartment and replace the battery cover. Slidethe cover on so that the screw holes are aligned.5. Replace the black rubber feet.6. Cycle power on by using the On/Off button.7. Make sure the system status indicator (see page 21) in the center of the <strong>AED</strong> <strong>10</strong>indicates that the battery has sufficient charge. If the system status indicator displaysanything other than the Battery Ready icon, the <strong>Welch</strong> <strong>Allyn</strong> <strong>AED</strong> <strong>10</strong> is not ready foruse. See “Troubleshooting” on page 69.System status indicatorRALL123<strong>AED</strong><strong>10</strong>Running a self-testAfter installing the battery, the <strong>Welch</strong> <strong>Allyn</strong> <strong>AED</strong> <strong>10</strong> automatically powers up and performsa self-test. At power-up, the following tests are performed: battery, main processor,memory and program, stuck key, ECG acquisition system, and defibrillator.