FLK Gas Sampling System - MPIP - Free
FLK Gas Sampling System - MPIP - Free
FLK Gas Sampling System - MPIP - Free
- No tags were found...

You also want an ePaper? Increase the reach of your titles
YUMPU automatically turns print PDFs into web optimized ePapers that Google loves.
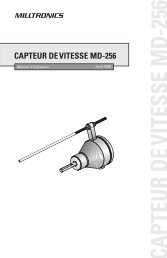
SQ250 <strong>FLK</strong> <strong>Gas</strong> <strong>Sampling</strong> <strong>System</strong><br />
If the coolant temperature briefly reaches 230°C, normally no more gas bubble formation occurs.<br />
Caution:<br />
The probe temperature and therefore the coolant temperature must only briefly attain 230°C since<br />
otherwise the probe may be damaged.<br />
When heating the coolant, all the flange joints and welded seams should be checked for sealing, since the coolant is<br />
substantially thinner at high temperature. Any leaks occurring must be immediately remedied. It is essential to retighten the<br />
screws on the flange joints after heating the cooling system.<br />
3.2.6 Measures for emergency-stop<br />
It is recommended that the area around the probe (including traversing path) is closed off and access to this area restricted to<br />
authorized personnel. Within this area an emergency-stop button, can be fitted which stops the automatic traversing of the<br />
probe when operated.<br />
Caution:<br />
If the emergency-stop button is pressed, a dangerous condition can arise. For example, if the probe is still in the<br />
hot range and a fault occurs causing overheating of the probe (coolant flow >min.).<br />
To prevent damage of the probe, the emergency-stop button (with latch) should be released<br />
as soon as possible.<br />
With power failure the compressed air motor is used to withdraw the probe, even thought the<br />
emergency-stop button is pressed.<br />
While ever the emergency-stop button is operated, the red fault lamps in the PLC controller and on the local control panel<br />
flash and cannot be cancelled.<br />
3.2.7 Automatic probe retraction<br />
In order to be able to test the automatic insertion and retraction in a short time the hours timer TMR 10 must be set to a<br />
minutes timer by entering 60, i.e. the interval for retraction and insertion is now counted in minutes instead of hours.<br />
The time up to the start of "Retraction" can be read in the CTR 6 after manual insertion and switching to automatic (enter a<br />
minimum of 10min.).<br />
When this period expires, the horn and flashing light for the traverse warning turned on. When the horn time expires, the<br />
probe starts to retract. When the retraction is finished, the flashing light stops and the waiting period up to the re-insertion<br />
starts (TMR 0). Then the retraction warning starts and automatic insertion takes place.<br />
In this operating mode the signals, e.g. contactor fault (ESS INSERT, ESS WITHDRAW) and the time delay signals<br />
(DELAY INSERTION / RETRACTION) can be simulated.<br />
Once these tests are concluded, the TMR 10 must be set to 3600 sec. again.<br />
The required time interval for automatic insertion / retraction can be entered in the CTR 6 again in hours.<br />
The indicating lamps on the local control panel and on the controller flash if no analysis is not being carried out, i.e.: the<br />
measuring gas pump is switched off, also with the purging process running.<br />
Copyright ® SIEMENS Page 21 04/04
![[ ]](https://img.yumpu.com/53283450/1/184x260/-.jpg?quality=85)