

Transaction Express User Guide - Merchant Service Group
Transaction Express User Guide - Merchant Service Group
Transaction Express User Guide - Merchant Service Group

You also want an ePaper? Increase the reach of your titles
YUMPU automatically turns print PDFs into web optimized ePapers that Google loves.
Add a<br />
Role<br />
16<br />
[<strong>Transaction</strong> <strong>Express</strong> <strong>User</strong> <strong>Guide</strong>]<br />
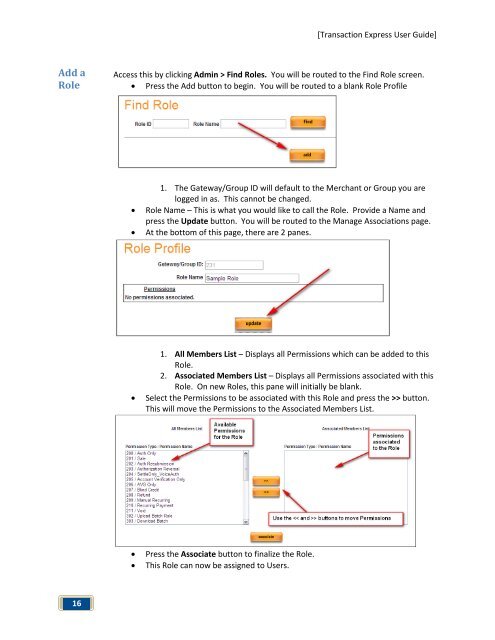
Access this by clicking Admin > Find Roles. You will be routed to the Find Role screen.<br />
• Press the Add button to begin. You will be routed to a blank Role Profile<br />
1. The Gateway/<strong>Group</strong> ID will default to the <strong>Merchant</strong> or <strong>Group</strong> you are<br />
logged in as. This cannot be changed.<br />
• Role Name – This is what you would like to call the Role. Provide a Name and<br />
press the Update button. You will be routed to the Manage Associations page.<br />
• At the bottom of this page, there are 2 panes.<br />
1. All Members List – Displays all Permissions which can be added to this<br />
Role.<br />
2. Associated Members List – Displays all Permissions associated with this<br />
Role. On new Roles, this pane will initially be blank.<br />
• Select the Permissions to be associated with this Role and press the >> button.<br />
This will move the Permissions to the Associated Members List.<br />
• Press the Associate button to finalize the Role.<br />
• This Role can now be assigned to <strong>User</strong>s.