

Transaction Express User Guide - Merchant Service Group
Transaction Express User Guide - Merchant Service Group
Transaction Express User Guide - Merchant Service Group

Create successful ePaper yourself
Turn your PDF publications into a flip-book with our unique Google optimized e-Paper software.
Add /<br />
Update<br />
Customer<br />
52<br />
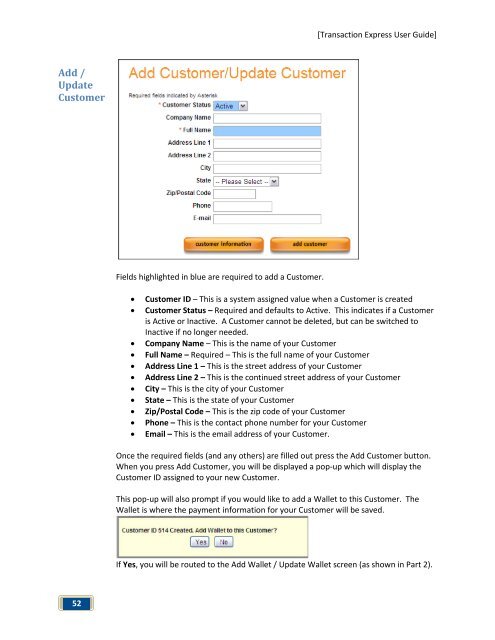
Fields highlighted in blue are required to add a Customer.<br />
[<strong>Transaction</strong> <strong>Express</strong> <strong>User</strong> <strong>Guide</strong>]<br />
• Customer ID – This is a system assigned value when a Customer is created<br />
• Customer Status – Required and defaults to Active. This indicates if a Customer<br />
is Active or Inactive. A Customer cannot be deleted, but can be switched to<br />
Inactive if no longer needed.<br />
• Company Name – This is the name of your Customer<br />
• Full Name – Required – This is the full name of your Customer<br />
• Address Line 1 – This is the street address of your Customer<br />
• Address Line 2 – This is the continued street address of your Customer<br />
• City – This is the city of your Customer<br />
• State – This is the state of your Customer<br />
• Zip/Postal Code – This is the zip code of your Customer<br />
• Phone – This is the contact phone number for your Customer<br />
• Email – This is the email address of your Customer.<br />
Once the required fields (and any others) are filled out press the Add Customer button.<br />
When you press Add Customer, you will be displayed a pop-up which will display the<br />
Customer ID assigned to your new Customer.<br />
This pop-up will also prompt if you would like to add a Wallet to this Customer. The<br />
Wallet is where the payment information for your Customer will be saved.<br />
If Yes, you will be routed to the Add Wallet / Update Wallet screen (as shown in Part 2).