

Transaction Express User Guide - Merchant Service Group
Transaction Express User Guide - Merchant Service Group
Transaction Express User Guide - Merchant Service Group

Create successful ePaper yourself
Turn your PDF publications into a flip-book with our unique Google optimized e-Paper software.
48<br />
[<strong>Transaction</strong> <strong>Express</strong> <strong>User</strong> <strong>Guide</strong>]<br />
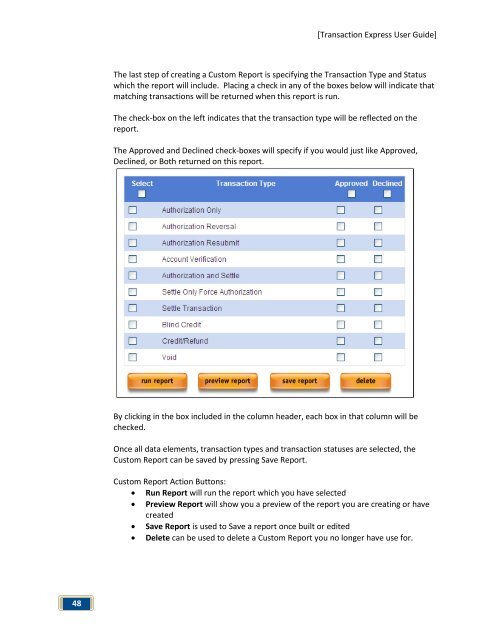
The last step of creating a Custom Report is specifying the <strong>Transaction</strong> Type and Status<br />
which the report will include. Placing a check in any of the boxes below will indicate that<br />
matching transactions will be returned when this report is run.<br />
The check-box on the left indicates that the transaction type will be reflected on the<br />
report.<br />
The Approved and Declined check-boxes will specify if you would just like Approved,<br />
Declined, or Both returned on this report.<br />
By clicking in the box included in the column header, each box in that column will be<br />
checked.<br />
Once all data elements, transaction types and transaction statuses are selected, the<br />
Custom Report can be saved by pressing Save Report.<br />
Custom Report Action Buttons:<br />
• Run Report will run the report which you have selected<br />
• Preview Report will show you a preview of the report you are creating or have<br />
created<br />
• Save Report is used to Save a report once built or edited<br />
• Delete can be used to delete a Custom Report you no longer have use for.