

Samsung ML-3051N - User Manual_9.08 MB, pdf, ENGLISH
Samsung ML-3051N - User Manual_9.08 MB, pdf, ENGLISH
Samsung ML-3051N - User Manual_9.08 MB, pdf, ENGLISH

Create successful ePaper yourself
Turn your PDF publications into a flip-book with our unique Google optimized e-Paper software.
Notes<br />
• Do not push the paper width guide far enough to cause the<br />
material to warp.<br />
• If you do not adjust the paper width guide, it may cause paper<br />
jams.<br />
3 Load the paper with the side to be printed on facing up.<br />
Using the multi-purpose tray<br />
The multi-purpose tray can hold special sizes and types of print material,<br />
such as transparencies, postcards, note cards, and envelopes. It is<br />
useful for single page printing on letterhead or colored paper.<br />
To load paper in the multi-purpose tray:<br />
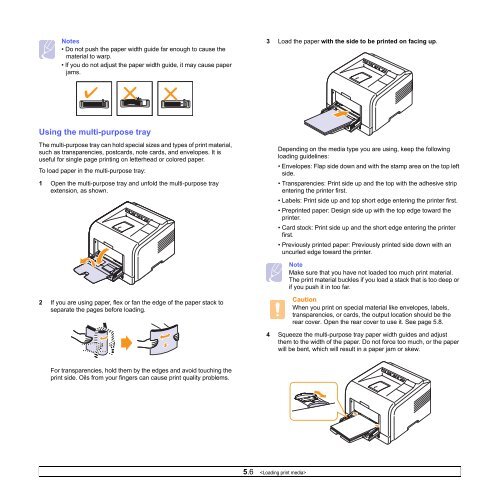
1 Open the multi-purpose tray and unfold the multi-purpose tray<br />
extension, as shown.<br />
Depending on the media type you are using, keep the following<br />
loading guidelines:<br />
• Envelopes: Flap side down and with the stamp area on the top left<br />
side.<br />
• Transparencies: Print side up and the top with the adhesive strip<br />
entering the printer first.<br />
• Labels: Print side up and top short edge entering the printer first.<br />
• Preprinted paper: Design side up with the top edge toward the<br />
printer.<br />
• Card stock: Print side up and the short edge entering the printer<br />
first.<br />
• Previously printed paper: Previously printed side down with an<br />
uncurled edge toward the printer.<br />
Note<br />
Make sure that you have not loaded too much print material.<br />
The print material buckles if you load a stack that is too deep or<br />
if you push it in too far.<br />
2 If you are using paper, flex or fan the edge of the paper stack to<br />
separate the pages before loading.<br />
Caution<br />
When you print on special material like envelopes, labels,<br />
transparencies, or cards, the output location should be the<br />
rear cover. Open the rear cover to use it. See page 5.8.<br />
4 Squeeze the multi-purpose tray paper width guides and adjust<br />
them to the width of the paper. Do not force too much, or the paper<br />
will be bent, which will result in a paper jam or skew.<br />
For transparencies, hold them by the edges and avoid touching the<br />
print side. Oils from your fingers can cause print quality problems.<br />
5.6


