

Samsung ML-3051N - User Manual_9.08 MB, pdf, ENGLISH
Samsung ML-3051N - User Manual_9.08 MB, pdf, ENGLISH
Samsung ML-3051N - User Manual_9.08 MB, pdf, ENGLISH

You also want an ePaper? Increase the reach of your titles
YUMPU automatically turns print PDFs into web optimized ePapers that Google loves.
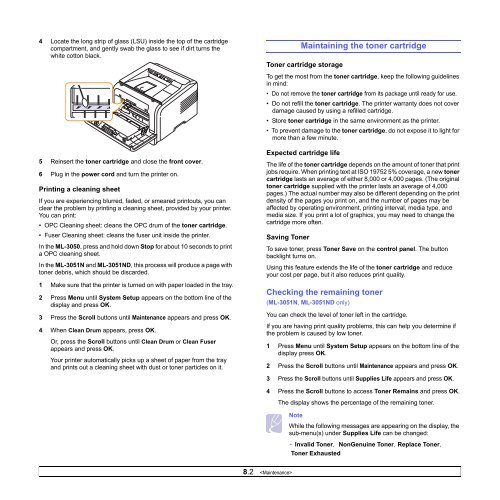
4 Locate the long strip of glass (LSU) inside the top of the cartridge<br />
compartment, and gently swab the glass to see if dirt turns the<br />
white cotton black.<br />
Maintaining the toner cartridge<br />
Toner cartridge storage<br />
To get the most from the toner cartridge, keep the following guidelines<br />
in mind:<br />
• Do not remove the toner cartridge from its package until ready for use.<br />
• Do not refill the toner cartridge. The printer warranty does not cover<br />
damage caused by using a refilled cartridge.<br />
• Store toner cartridge in the same environment as the printer.<br />
• To prevent damage to the toner cartridge, do not expose it to light for<br />
more than a few minute.<br />
5 Reinsert the toner cartridge and close the front cover.<br />
6 Plug in the power cord and turn the printer on.<br />
Printing a cleaning sheet<br />
If you are experiencing blurred, faded, or smeared printouts, you can<br />
clear the problem by printing a cleaning sheet, provided by your printer.<br />
You can print:<br />
• OPC Cleaning sheet: cleans the OPC drum of the toner cartridge.<br />
• Fuser Cleaning sheet: cleans the fuser unit inside the printer.<br />
In the <strong>ML</strong>-3050, press and hold down Stop for about 10 seconds to print<br />
a OPC cleaning sheet.<br />
In the <strong>ML</strong>-<strong>3051N</strong> and <strong>ML</strong>-<strong>3051N</strong>D, this process will produce a page with<br />
toner debris, which should be discarded.<br />
1 Make sure that the printer is turned on with paper loaded in the tray.<br />
2 Press Menu until System Setup appears on the bottom line of the<br />
display and press OK.<br />
3 Press the Scroll buttons until Maintenance appears and press OK.<br />
4 When Clean Drum appears, press OK.<br />
Or, press the Scroll buttons until Clean Drum or Clean Fuser<br />
appears and press OK.<br />
Your printer automatically picks up a sheet of paper from the tray<br />
and prints out a cleaning sheet with dust or toner particles on it.<br />
Expected cartridge life<br />
The life of the toner cartridge depends on the amount of toner that print<br />
jobs require. When printing text at ISO 19752 5% coverage, a new toner<br />
cartridge lasts an average of either 8,000 or 4,000 pages. (The original<br />
toner cartridge supplied with the printer lasts an average of 4,000<br />
pages.) The actual number may also be different depending on the print<br />
density of the pages you print on, and the number of pages may be<br />
affected by operating environment, printing interval, media type, and<br />
media size. If you print a lot of graphics, you may need to change the<br />
cartridge more often.<br />
Saving Toner<br />
To save toner, press Toner Save on the control panel. The button<br />
backlight turns on.<br />
Using this feature extends the life of the toner cartridge and reduce<br />
your cost per page, but it also reduces print quality.<br />
Checking the remaining toner<br />
(<strong>ML</strong>-<strong>3051N</strong>, <strong>ML</strong>-<strong>3051N</strong>D only)<br />
You can check the level of toner left in the cartridge.<br />
If you are having print quality problems, this can help you determine if<br />
the problem is caused by low toner.<br />
1 Press Menu until System Setup appears on the bottom line of the<br />
display press OK.<br />
2 Press the Scroll buttons until Maintenance appears and press OK.<br />
3 Press the Scroll buttons until Supplies Life appears and press OK.<br />
4 Press the Scroll buttons to access Toner Remains and press OK.<br />
The display shows the percentage of the remaining toner.<br />
Note<br />
While the following messages are appearing on the display, the<br />
sub-menu(s) under Supplies Life can be changed:<br />
- Invalid Toner, NonGenuine Toner, Replace Toner,<br />
Toner Exhausted<br />
8.2


