Orion 2117HL High Level Chloride Analyzer User Guide
Orion 2117HL High Level Chloride Analyzer User Guide
Orion 2117HL High Level Chloride Analyzer User Guide

Create successful ePaper yourself
Turn your PDF publications into a flip-book with our unique Google optimized e-Paper software.
<strong>Analyzer</strong> Preparation<br />
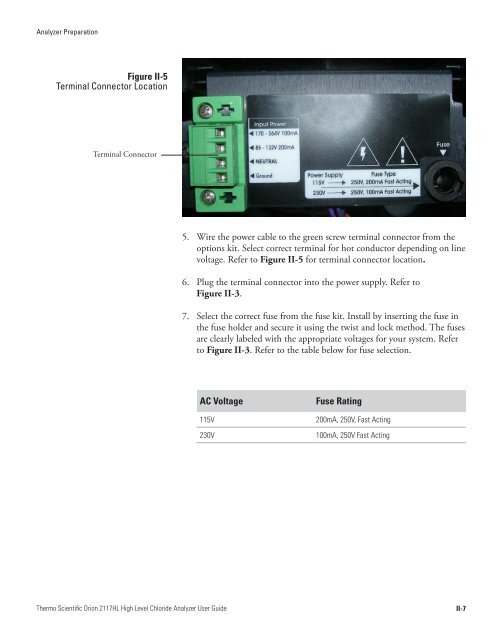
Figure II-5<br />
Terminal Connector Location<br />
Terminal Connector<br />
Thermo Scientific <strong>Orion</strong> <strong>2117HL</strong> <strong>High</strong> <strong>Level</strong> <strong>Chloride</strong> <strong>Analyzer</strong> <strong>User</strong> <strong>Guide</strong><br />
5. Wire the power cable to the green screw terminal connector from the<br />
options kit. Select correct terminal for hot conductor depending on line<br />
voltage. Refer to Figure II-5 for terminal connector location.<br />
6. Plug the terminal connector into the power supply. Refer to<br />
Figure II-3.<br />
7. Select the correct fuse from the fuse kit. Install by inserting the fuse in<br />
the fuse holder and secure it using the twist and lock method. The fuses<br />
are clearly labeled with the appropriate voltages for your system. Refer<br />
to Figure II-3. Refer to the table below for fuse selection.<br />
AC Voltage Fuse Rating<br />
115V 200mA, 250V, Fast Acting<br />
230V 100mA, 250V Fast Acting<br />
II-7