


You also want an ePaper? Increase the reach of your titles
YUMPU automatically turns print PDFs into web optimized ePapers that Google loves.
Creating outlines<br />
Painting and Drawing 101<br />
Two approaches to creating outlines are available within <strong>PhotoPlus</strong>—creating an<br />
outline from any current selection and creating outlines around layer objects,<br />
especially text and shapes (as a layer effect). You'll primarily create outlines<br />
around text and other objects so the latter method is predominantly used (but we'll<br />
cover both!).<br />
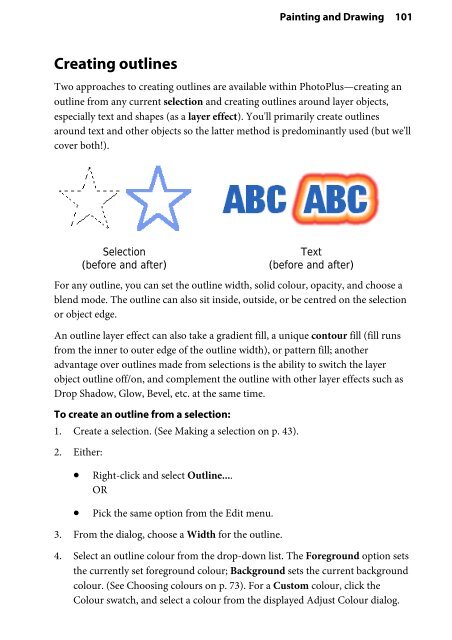
Selection<br />
(before and after)<br />
Text<br />
(before and after)<br />
For any outline, you can set the outline width, solid colour, opacity, and choose a<br />
blend mode. The outline can also sit inside, outside, or be centred on the selection<br />
or object edge.<br />
An outline layer effect can also take a gradient fill, a unique contour fill (fill runs<br />
from the inner to outer edge of the outline width), or pattern fill; another<br />
advantage over outlines made from selections is the ability to switch the layer<br />
object outline off/on, and complement the outline with other layer effects such as<br />
Drop Shadow, Glow, Bevel, etc. at the same time.<br />
To create an outline from a selection:<br />
1. Create a selection. (See Making a selection on p. 43).<br />
2. Either:<br />
• Right-click and select Outline....<br />
OR<br />
• Pick the same option from the Edit menu.<br />
3. From the dialog, choose a Width for the outline.<br />
4. Select an outline colour from the drop-down list. The Foreground option sets<br />
the currently set foreground colour; Background sets the current background<br />
colour. (See Choosing colours on p. 73). For a Custom colour, click the<br />
Colour swatch, and select a colour from the displayed Adjust Colour dialog.


