


Create successful ePaper yourself
Turn your PDF publications into a flip-book with our unique Google optimized e-Paper software.
To rotate:<br />
1. Choose Rotate from the Image menu.<br />
Manipulating Images 61<br />
2. From the flyout menu, select an option based on the object (Image, Layer, or<br />
Selection), rotation angle (90º or 180º), and the direction (Clockwise or Anticlockwise)<br />
required.<br />
3. You can also select Custom..., to display a Rotate dialog, from which you can<br />
do the above but instead set your own custom angle, even down to fractional<br />
degrees.<br />
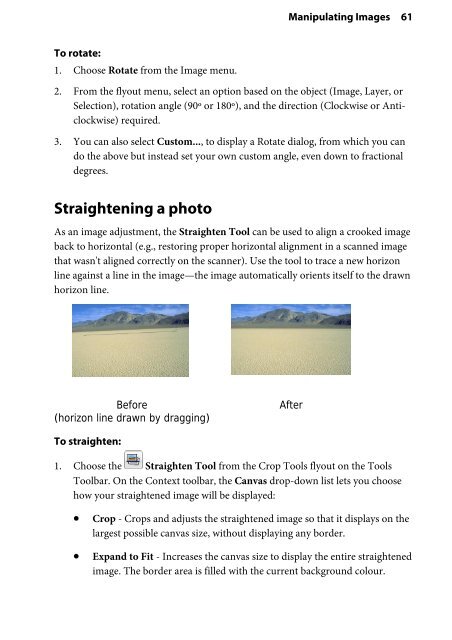
Straightening a photo<br />
As an image adjustment, the Straighten Tool can be used to align a crooked image<br />
back to horizontal (e.g., restoring proper horizontal alignment in a scanned image<br />
that wasn't aligned correctly on the scanner). Use the tool to trace a new horizon<br />
line against a line in the image—the image automatically orients itself to the drawn<br />
horizon line.<br />
Before<br />
(horizon line drawn by dragging)<br />
To straighten:<br />
After<br />
1. Choose the Straighten Tool from the Crop Tools flyout on the Tools<br />
Toolbar. On the Context toolbar, the Canvas drop-down list lets you choose<br />
how your straightened image will be displayed:<br />
• Crop - Crops and adjusts the straightened image so that it displays on the<br />
largest possible canvas size, without displaying any border.<br />
• Expand to Fit - Increases the canvas size to display the entire straightened<br />
image. The border area is filled with the current background colour.


