Sound Processor
Sound Processor
Sound Processor
Create successful ePaper yourself
Turn your PDF publications into a flip-book with our unique Google optimized e-Paper software.
Proel <strong>Sound</strong> <strong>Processor</strong>s User Manual<br />
Proel zetaverb – Quick Start Guide<br />
To connect this unit you need unbalanced (TS) ¼” cables carrying line level signals from your<br />
mixer, or other line level source, to be connected to ¼” jacks of this unit rear panel.<br />
If your sound source is monophonic, please connect the cable to “LEFT/MONO” input jack only.<br />
For stereo sound sources, use both “LEFT/MONO” and “RIGHT” jacks by connecting two discrete<br />
cables to each of the two inputs.<br />
Set the output level of your sound source (mixer or other line level source) and the input gain<br />
(“INPUT LEVEL”) so that CLIP LED will never turn on.<br />
Connect unit outputs (“OUTUPT LEFT” and “OUTPUT RIGHT”) to your mixer effects return or<br />
stereo line level input or to your active speakers.<br />
Please make sure “FX/BYPASS” LED is turned off.<br />
Rotate the “OUTPUT LEVEL” knob until reaching the desired output signal level.<br />
Now you can choose the effect you want to use by rotating the selection knob (7).<br />
Using “MIX” knob set the quantity of direct signal (DRY) versus effect signal (WET) to be sent to<br />
outputs.<br />
Please see page 72 for further details.<br />
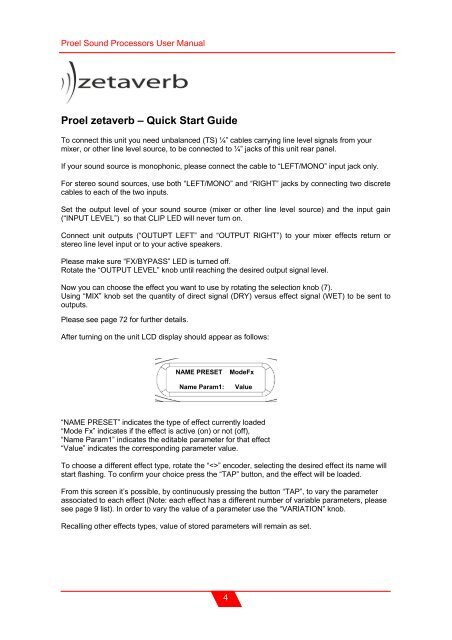
After turning on the unit LCD display should appear as follows:<br />
NAME PRESET<br />
Name Param1:<br />
ModeFx<br />
Value<br />
“NAME PRESET” indicates the type of effect currently loaded<br />
“Mode Fx” indicates if the effect is active (on) or not (off),<br />
“Name Param1” indicates the editable parameter for that effect<br />
“Value” indicates the corresponding parameter value.<br />
To choose a different effect type, rotate the “” encoder, selecting the desired effect its name will<br />
start flashing. To confirm your choice press the “TAP” button, and the effect will be loaded.<br />
From this screen it’s possible, by continuously pressing the button “TAP”, to vary the parameter<br />
associated to each effect (Note: each effect has a different number of variable parameters, please<br />
see page 9 list). In order to vary the value of a parameter use the “VARIATION” knob.<br />
Recalling other effects types, value of stored parameters will remain as set.<br />
4


