- Page 1 and 2:
User Manual
- Page 3 and 4:
Table Of ContentsThe List View ....
- Page 5 and 6:
Table Of ContentsAdvanced Adding an
- Page 7:
WELCOME TO SMARTADDRESSER 5!SmartAd
- Page 10 and 11:
SmartAddresser 52. Label Designer B
- Page 12 and 13:
SmartAddresser 5INSTALLATION INSTRU
- Page 14 and 15:
SmartAddresser 55. The next two scr
- Page 16 and 17:
SmartAddresser 5• Optimizing the
- Page 18 and 19:
SmartAddresser 5TIP!SmartAddresser
- Page 20 and 21:
SmartAddresser 5Once the input file
- Page 22 and 23:
SmartAddresser 5you'd select the ad
- Page 24 and 25:
SmartAddresser 5Check the boxes as
- Page 26 and 27:
SmartAddresser 5The SmartAddresser
- Page 28 and 29:
SmartAddresser 5temporarily deleted
- Page 30 and 31:
SmartAddresser 5• From the Status
- Page 32 and 33:
SmartAddresser 5• Click OK, and y
- Page 34 and 35:
SmartAddresser 5• Click Presort,
- Page 36 and 37:
SmartAddresser 5When printing tags,
- Page 38 and 39:
SmartAddresser 5SMARTADDRESSER 5 SY
- Page 40 and 41:
SmartAddresser 5Filter.Displays the
- Page 42 and 43:
SmartAddresser 5Creates a new datab
- Page 44 and 45:
SmartAddresser 5KEYBOARD SHORTCUTS
- Page 46 and 47:
SmartAddresser 5OPENING A NEW LISTS
- Page 49 and 50:
Duplicate DetectionTIP!You can also
- Page 51 and 52:
Duplicate Detection• Select the d
- Page 53 and 54:
Duplicate Detectionlocation of the
- Page 55 and 56:
Duplicate Detectionusing the file n
- Page 57 and 58:
Duplicate DetectionTIP!If you do no
- Page 59 and 60:
Duplicate DetectionFor information
- Page 61 and 62:
Follow the steps below to Export da
- Page 63 and 64:
VIEWING THE DATATHE LIST VIEWThe Li
- Page 65 and 66:
Duplicate DetectionUSER DEFINED SOR
- Page 67 and 68:
Duplicate DetectionSORTING BY DEFAU
- Page 69 and 70:
Duplicate DetectionTIP!For informat
- Page 71 and 72:
Duplicate Detection• Type a name
- Page 73 and 74:
Duplicate Detectionthe appropriate
- Page 75 and 76:
Duplicate Detection• Click on the
- Page 77 and 78:
Duplicate DetectionThe Table Design
- Page 79 and 80:
Duplicate DetectionFloat fields spe
- Page 81 and 82:
Duplicate Detection• Position you
- Page 83 and 84:
Duplicate Detection• Click Fill.U
- Page 85 and 86:
Duplicate Detection• Select the f
- Page 87 and 88:
Duplicate Detection• Click Go.Rec
- Page 89 and 90:
Duplicate DetectionThe Nth Select w
- Page 91 and 92:
Duplicate Detection• Click on the
- Page 93 and 94:
Duplicate DetectionThe Recall windo
- Page 95 and 96:
Duplicate Detection• Click on the
- Page 97 and 98:
Duplicate Detection• Deliverable
- Page 99 and 100:
Duplicate DetectionResize field wid
- Page 101 and 102:
Duplicate DetectionCheck the desire
- Page 103 and 104:
Duplicate DetectionFor more informa
- Page 105 and 106: Duplicate Detection* Creates a fiel
- Page 107 and 108: Duplicate Detection• Select the d
- Page 109 and 110: Duplicate DetectionTIP!The informat
- Page 111 and 112: Duplicate Detection• If you plan
- Page 113 and 114: DUPLICATE DETECTIONDUPLICATE DETECT
- Page 115 and 116: Duplicate DetectionOriginal* Keeps
- Page 117 and 118: Duplicate DetectionExact Match* Wil
- Page 119 and 120: SEARCHING AND QUERYING DATABASIC SE
- Page 121 and 122: Searching and Querying Data• Sele
- Page 123 and 124: Searching and Querying DataTIP!When
- Page 125 and 126: Searching and Querying DataCREATING
- Page 127: Searching and Querying Data• Type
- Page 130 and 131: SmartAddresser 5Piece SetupThe Clas
- Page 132 and 133: SmartAddresser 5Calculator indicati
- Page 134 and 135: SmartAddresser 5Container Setup128p
- Page 136 and 137: SmartAddresser 5Check the Include C
- Page 138 and 139: SmartAddresser 5The Prepare in Reve
- Page 140 and 141: PrintingPRINTINGPRINTING ADDRESS LA
- Page 142 and 143: SmartAddresser 5Opens the Label Des
- Page 144 and 145: SmartAddresser 5PRINTING CONTAINER
- Page 146 and 147: SmartAddresser 5EDITING LABEL AND R
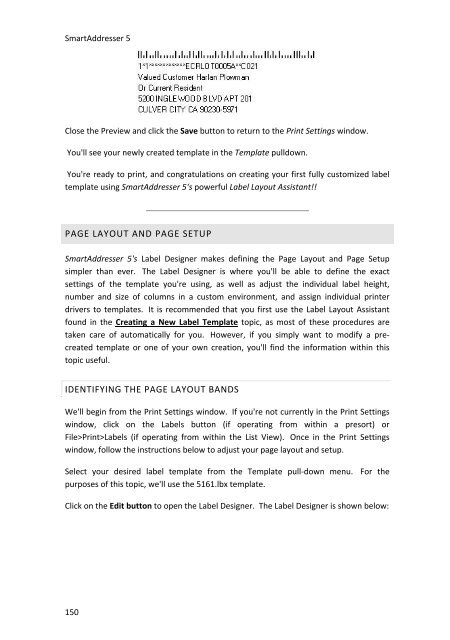
- Page 148 and 149: SmartAddresser 5Using the column se
- Page 150 and 151: SmartAddresser 5After selecting you
- Page 152 and 153: SmartAddresser 5Since you already k
- Page 154 and 155: SmartAddresser 5Next we'll add the
- Page 158 and 159: SmartAddresser 5endorsement, name,
- Page 160 and 161: SmartAddresser 5Adjust the Page Set
- Page 162 and 163: SmartAddresser 5This area of the Pa
- Page 164 and 165: SmartAddresser 5Click OK to close t
- Page 166 and 167: SmartAddresser 5type. Furthermore,
- Page 168 and 169: SmartAddresser 5first,lastaddressci
- Page 170 and 171: SmartAddresser 5the field name. Whe
- Page 172 and 173: SmartAddresser 5Choose the appropri
- Page 174 and 175: SmartAddresser 5You can see the too
- Page 176 and 177: SmartAddresser 5objects.Send to Bac
- Page 178 and 179: SmartAddresser 5line when they are
- Page 180 and 181: SmartAddresser 5Have a repetitive j
- Page 182 and 183: SmartAddresser 5Deletes the current
- Page 184 and 185: SmartAddresser 5With the Scripts Wi
- Page 186 and 187: SmartAddresser 5Click on the open b
- Page 188 and 189: SmartAddresser 5Click the "Auto" ch
- Page 190 and 191: SmartAddresser 5We're halfway there
- Page 192 and 193: SmartAddresser 5Click the Save butt
- Page 194 and 195: SmartAddresser 5Congratulations, yo
- Page 196 and 197: PROPERTIESDICTIONARIESA.K.A. Dictio
- Page 198 and 199: SmartAddresser 5If you recognize a
- Page 200 and 201: SmartAddresser 5The next time you p
- Page 202 and 203: SmartAddresser 5FOLDERS PROPERTIES
- Page 204 and 205: SmartAddresser 5• Click on the Ed
- Page 206 and 207:
SmartAddresser 5None* Displays a gr
- Page 208 and 209:
SmartAddresser 5Suffix* Punctuates
- Page 210 and 211:
SmartAddresser 5• Click OK.204
- Page 213 and 214:
CONTACT AND SUPPORT INFORMATIONTECH
- Page 215 and 216:
LICENSE AGREEMENT AND COPYRIGHTSSMA
- Page 217 and 218:
License Agreement and Copyrightsthe
- Page 219 and 220:
APPENDIXSMARTADDRESSER 5 DEFAULT FI
- Page 221 and 222:
department Character 50 Contact Dep
- Page 223 and 224:
ozipcode Character 10 Original Zip
- Page 225 and 226:
PPO Box RecordRRural Route RecordSS
- Page 227 and 228:
H Firm matchI Highrise matchJ Highr
- Page 229 and 230:
- missing unit number (i.e. 123 foo
- Page 231 and 232:
14 Incorrect suffix, directional, s
- Page 233 and 234:
M Street suffix corrected123 Anacap
- Page 235 and 236:
6 ZIPMOVE match2 Garden DriveLitchf
- Page 237 and 238:
Auto Map Field List ...............
- Page 239 and 240:
Count .............................
- Page 241 and 242:
Duplicate Detection window ........
- Page 243 and 244:
Folder Watch ......................
- Page 245 and 246:
81, 86, 89, 103, 107, 113LACS .....
- Page 247 and 248:
Nth Select window .................
- Page 249 and 250:
Properties ........... 9, 194, 196,
- Page 251 and 252:
81, 89, 93, 103, 107, 111, 114, 190
- Page 253:
View>Font .........................