
You also want an ePaper? Increase the reach of your titles
YUMPU automatically turns print PDFs into web optimized ePapers that Google loves.
RECORDING (CAPTURING) LIVE DATA<br />
OBD2 Live Data Mode<br />
RECORDING (CAPTURING) LIVE DATA<br />
You can record and save several frames of Live Data information for<br />
each PID supported by the vehicle in the CanOBD2&1 <strong>Scan</strong> <strong>Tool</strong>'s<br />
memory. Recorded Live Data can serve as valuable information to help<br />
you in the troubleshooting of vehicle problems.<br />
There are two ways that the CanOBD2&1 <strong>Scan</strong> <strong>Tool</strong> can "record" Live<br />
Data:<br />
� Record by DTC Trigger<br />
� Record by Manual Trigger<br />
If the POWER/LINK button is pressed at any time while in<br />
Live Data mode, any stored (recorded) Live Data will be<br />
cleared (erased) from the CanOBD2&1 <strong>Scan</strong> <strong>Tool</strong>’s memory.<br />
Record by DTC Trigger<br />
This function automatically records (captures) Live Data information<br />
when a DTC sets and saves it in the CanOBD2&1 <strong>Scan</strong> <strong>Tool</strong>’s memory.<br />
The recorded (captured) data can be a valuable troubleshooting aid,<br />
particularly if you are experiencing a fault that is causing a DTC to set.<br />
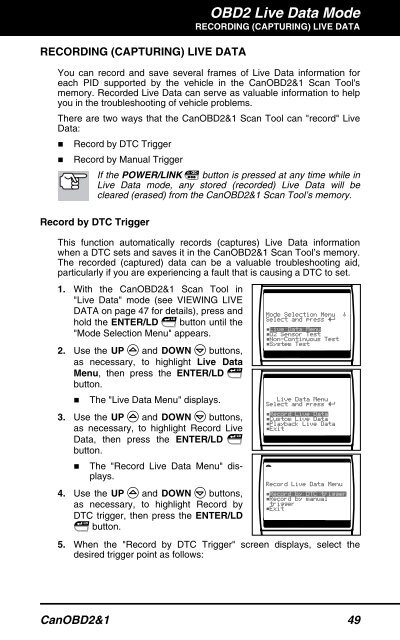
1. With the CanOBD2&1 <strong>Scan</strong> <strong>Tool</strong> in<br />
"Live Data" mode (see VIEWING LIVE<br />
DATA on page 47 for details), press and<br />
hold the ENTER/LD button until the<br />
"Mode Selection Menu" appears.<br />
2. Use the UP and DOWN buttons,<br />
as necessary, to highlight Live Data<br />
Menu, then press the ENTER/LD<br />
button.<br />
� The "Live Data Menu" displays.<br />
3. Use the UP and DOWN buttons,<br />
as necessary, to highlight Record Live<br />
Data, then press the ENTER/LD<br />
button.<br />
� The "Record Live Data Menu" displays.<br />
4. Use the UP and DOWN buttons,<br />
as necessary, to highlight Record by<br />
DTC trigger, then press the ENTER/LD<br />
button.<br />
5. When the "Record by DTC Trigger" screen displays, select the<br />
desired trigger point as follows:<br />
CanOBD2&1 49