
Create successful ePaper yourself
Turn your PDF publications into a flip-book with our unique Google optimized e-Paper software.
OBD2 Live Data Mode<br />
RECORDING (CAPTURING) LIVE DATA<br />
If Yes is selected, the CanOBD2&1 <strong>Scan</strong> <strong>Tool</strong> enters<br />
"Playback" mode from which you can view a frame-by-frame<br />
playback of recorded Live Data (see LIVE DATA PLAYBACK<br />
on page 53 for details). If No is selected, the display returns to<br />
the "Live Data View" mode.<br />
9. You can exit the "Record Live Data Mode" at any time by pressing<br />
and holding the ENTER/LD button until the "Mode Selection<br />
Menu" displays.<br />
If desired, you can transfer the recorded Live Data information<br />
to a personal computer using the optional PC-LINK program<br />
(see instructions included with PC-Link for more information).<br />
Record by Manual Trigger<br />
This option lets you select the precise time at which the Live Data<br />
recording will occur. Record by Manual Trigger can be a very valuable<br />
diagnostic tool when troubleshooting intermittent problems that do not<br />
meet the requirements for a DTC to set. Even though a DTC is not<br />
present, the intermittent problems will sometimes manifest themselves<br />
briefly, for a few fractions of a second and/or only at certain vehicle<br />
speeds or vehicle operating conditions.<br />
1. With the CanOBD2&1 <strong>Scan</strong> <strong>Tool</strong> in<br />
"Live Data" mode (see VIEWING LIVE<br />
DATA on page 47 for details), press and<br />
hold the ENTER/LD button until the<br />
"Mode Selection Menu" appears.<br />
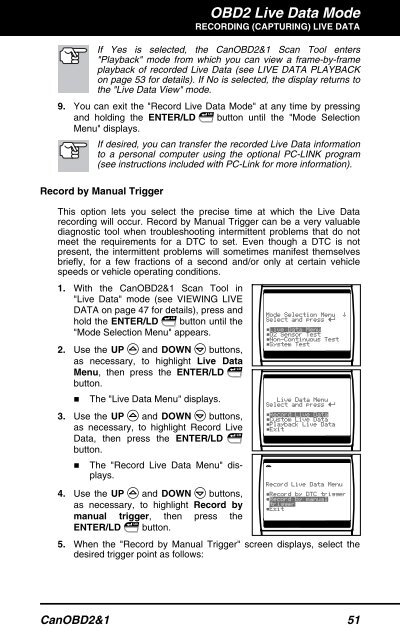
2. Use the UP and DOWN buttons,<br />
as necessary, to highlight Live Data<br />
Menu, then press the ENTER/LD<br />
button.<br />
� The "Live Data Menu" displays.<br />
3. Use the UP and DOWN buttons,<br />
as necessary, to highlight Record Live<br />
Data, then press the ENTER/LD<br />
button.<br />
� The "Record Live Data Menu" displays.<br />
4. Use the UP and DOWN buttons,<br />
as necessary, to highlight Record by<br />
manual trigger, then press the<br />
ENTER/LD button.<br />
5. When the "Record by Manual Trigger" screen displays, select the<br />
desired trigger point as follows:<br />
CanOBD2&1 51