
You also want an ePaper? Increase the reach of your titles
YUMPU automatically turns print PDFs into web optimized ePapers that Google loves.
OBD2 Live Data Mode<br />
LIVE DATA PLAYBACK<br />
When recorded Live Data is<br />
played back, all available PIDs are<br />
shown, even if you have customized<br />
the Live Data selections.<br />
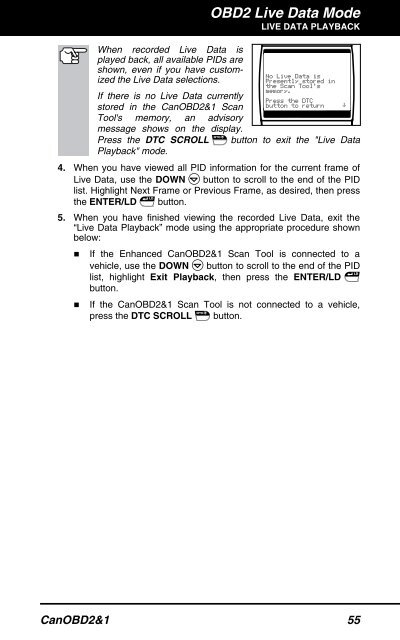
If there is no Live Data currently<br />
stored in the CanOBD2&1 <strong>Scan</strong><br />
<strong>Tool</strong>'s memory, an advisory<br />
message shows on the display.<br />
Press the DTC SCROLL button to exit the "Live Data<br />
Playback" mode.<br />
4. When you have viewed all PID information for the current frame of<br />
Live Data, use the DOWN button to scroll to the end of the PID<br />
list. Highlight Next Frame or Previous Frame, as desired, then press<br />
the ENTER/LD button.<br />
5. When you have finished viewing the recorded Live Data, exit the<br />
“Live Data Playback” mode using the appropriate procedure shown<br />
below:<br />
� If the Enhanced CanOBD2&1 <strong>Scan</strong> <strong>Tool</strong> is connected to a<br />
vehicle, use the DOWN button to scroll to the end of the PID<br />
list, highlight Exit Playback, then press the ENTER/LD<br />
button.<br />
� If the CanOBD2&1 <strong>Scan</strong> <strong>Tool</strong> is not connected to a vehicle,<br />
press the DTC SCROLL button.<br />
CanOBD2&1 55