Version 5.3.02 - Serendipity Software
Version 5.3.02 - Serendipity Software
Version 5.3.02 - Serendipity Software

Create successful ePaper yourself
Turn your PDF publications into a flip-book with our unique Google optimized e-Paper software.
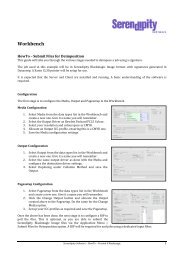
RIP Configuration <br />
If your Veripress install requires proofing RIP data, a RIP setup will need to be configured to poll the RIP jobs for <br />
processing. <br />
1. Select RIP from the data types list in the Workbench and create a new <br />
RIP by selecting File menu > New. <br />
2. A warning message will appear. Dismiss the message. <br />
3. The RIP name “Untitled” will appear in the item list, highlighted for <br />
renaming. Rename and select the item. <br />
4. In the Driver panel of the gray configuration area, select the appropriate <br />
RIP driver for the CTP RIP input from the dropdown list of licensed <br />
drivers. <br />
5. Configure the RIP driver options by enabling checkbox options and/or <br />
choosing Custom Settings by clicking the Edit button. <br />
6. Tick the Enable Polling checkbox in the Polling panel and enter a poll interval time, for example, 2 minutes. <br />
Note: Some RIP drivers and polling methods require the use of a Job Genie in order for the Veripress RIP setup to <br />
recognise incoming RIPped files. See the Workbench > Job Genie section of this manual for further details. Also, refer to <br />
the Support section of the <strong>Serendipity</strong> <strong>Software</strong> website for tutorials on creating your own customised Job Genies. <br />
7. Choose the method the RIP setup will use to connect to the RIP output folder from the dropdown menu in the <br />
Polling panel, for example, Localhost. Enter any Hostname/IP details if required. <br />
8. Enter the file path to the RIP folder in the Paths panel. To enter a path, click the New button below the panel. <br />
Click Browse on the popup window and navigate to the RIP folder to be polled. Click OK to save the path. <br />
9. If required, setup Stripe Paths. <br />
10. Click the Test button at the bottom of the Testing panel to Save and Test the RIP setup. The Testing panel will <br />
show a Polling OK result to confirm the RIP path is valid. Alternate messages will notify you if the RIP path is <br />
invalid, or if no RIPped files currently exist in the selected folder. <br />
This completes the basic configuration of Veripress. For information on how to see polled RIP jobs and submit them for <br />
proofing, see the Modules > RIP Monitor and <strong>Serendipity</strong> Client Menu Items > Submit Menu sections of this manual. <br />
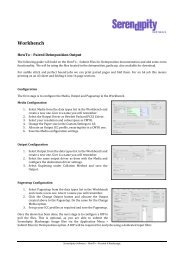
Monitoring Jobs – Configuration <br />
Once the base configuration is complete for the Media, Output, Pagesetup and (optional) RIP, a monitoring application <br />
needs to be configured so jobs can be managed throughout the system. <br />
There are two (2) types available – the Jobs (default)or the Monitor application. <br />
Jobs <br />
This is the default application, launched when the Client is started for the <br />
first time. <br />
The Jobs application has a pre-‐configured set of tabs available for <br />
monitoring various processing throughout the entire workflow. The <br />
default tab layout includes the QueueManager, Thumbnail and <br />
QueueStatus modules. See the “Jobs” application section within this manual <br />
for further information. <br />
Any Outputs created in the earlier configuration will automatically appear <br />
in the QueueManager module. <br />
<strong>Serendipity</strong> <strong>Software</strong> -‐ Veripress User Manual – <strong>Version</strong> <strong>5.3.02</strong> <br />
19