DI-770 Oscilloscope provides five virtual instruments in one
DI-770 Oscilloscope provides five virtual instruments in one
DI-770 Oscilloscope provides five virtual instruments in one

Create successful ePaper yourself
Turn your PDF publications into a flip-book with our unique Google optimized e-Paper software.
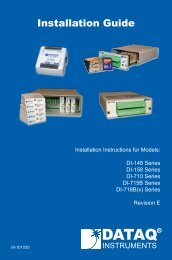
<strong>DI</strong>-<strong>770</strong> and WINDAQ/Scope Manual<br />
In the above picture, the trigger mode of the left hand symbol is set to Ris<strong>in</strong>g slope and the trigger mode of the right<br />
hand symbol is set to Fall<strong>in</strong>g slope.<br />
To adjust the trigger level us<strong>in</strong>g the trigger symbol, place the mouse po<strong>in</strong>ter on the trigger symbol, <strong>in</strong> the area that is<br />
marked adjust trigger level <strong>in</strong> the above picture. The mouse po<strong>in</strong>ter will change to a symbol. Press the left mouse<br />
button and drag the trigger symbol to the correct position, while keep<strong>in</strong>g the left mouse button pressed. While dragg<strong>in</strong>g,<br />
the trigger level is adjusted accord<strong>in</strong>g the position of the trigger symbol on the screen. When the mouse button<br />
is released, trigger level adjustment stops and the normal mouse po<strong>in</strong>ter shape is returned.<br />
To adjust the trigger hysteresis us<strong>in</strong>g the trigger symbol, place the mouse po<strong>in</strong>ter on the trigger symbol, <strong>in</strong> the area<br />
that is marked adjust trigger hysteresis <strong>in</strong> the above picture. The mouse po<strong>in</strong>ter will change to a symbol. Press<br />
the left mouse button and drag the hysteresis level of the trigger symbol to the correct position, while keep<strong>in</strong>g the left<br />
mouse button pressed. While dragg<strong>in</strong>g, the trigger hysteresis is adjusted accord<strong>in</strong>g the size of the trigger symbol.<br />
When the mouse button is released, trigger hysteresis adjustment stops and the normal mouse po<strong>in</strong>ter shape is<br />
returned.<br />
To adjust the trigger mode us<strong>in</strong>g the trigger symbol, place the mouse po<strong>in</strong>ter on the trigger symbol and double click<br />
the left mouse button. The trigger mode will change from:<br />
Fall<strong>in</strong>g slope to Ris<strong>in</strong>g slope<br />
Ris<strong>in</strong>g slope to Fall<strong>in</strong>g slope<br />
The trigger time out<br />
When the <strong>in</strong>put signal does not meet the trigger conditions, no new measurement data will be displayed and the last<br />
displayed signal will rema<strong>in</strong> on the screen. This can be very <strong>in</strong>convenient with unknown signals, s<strong>in</strong>ce it is not known<br />
how the trigger system has to be set. To provide <strong>in</strong> that case for a representation of the <strong>in</strong>put signal on the screen, a<br />
trigger time out sett<strong>in</strong>g is available.<br />
With the time out sett<strong>in</strong>g it is determ<strong>in</strong>ed how long the delay will be for a trigger pulse. If that time expires, a trigger<br />
pulse is forced by the software and the available data will be displayed. This will not result <strong>in</strong> a stable display, but it<br />
will give an impression how the trigger has to be set.<br />
To set the trigger time out, enter the Trigger menu and select the Time out ... item. An <strong>in</strong>put dialog will come up <strong>in</strong><br />
which the time out time can be entered, <strong>in</strong> seconds.<br />
When a time of zero is entered, there will be no trigger time out, but no trigger<strong>in</strong>g as well. As soon as a signal is displayed,<br />
the <strong>in</strong>strument will be set up for a new measurement and immediately a trigger pulse is generated, without<br />
wait<strong>in</strong>g for a trigger. This can be useful when e.g. a slowly chang<strong>in</strong>g DC level has to be monitored, on which can't be<br />
triggered.<br />
In the dialog also a check box for an <strong>in</strong>f<strong>in</strong>ite time out is available. When this box is checked, the software will keep<br />
wait<strong>in</strong>g for the <strong>in</strong>put signal to meet the trigger sett<strong>in</strong>gs, without ever forc<strong>in</strong>g a trigger pulse. This can be very useful <strong>in</strong><br />
<strong>one</strong> shot measurements and with auto disk measur<strong>in</strong>g.<br />
Perform<strong>in</strong>g measurements<br />
When the oscilloscope is completely set up, measurements can be performed.<br />
By default the oscilloscope is always measur<strong>in</strong>g and display<strong>in</strong>g. Changes that are made <strong>in</strong> the sett<strong>in</strong>gs can be made<br />
while measur<strong>in</strong>g and will be executed while measur<strong>in</strong>g, so the effects are immediately visible.<br />
Stopp<strong>in</strong>g the measurements<br />
To avoid a new screen of measurement data replac<strong>in</strong>g an old screen, measur<strong>in</strong>g and display<strong>in</strong>g of data can be stopped.<br />
This can be d<strong>one</strong> <strong>in</strong> several ways: by press<strong>in</strong>g the Pause button (<br />
item Stop cont<strong>in</strong>uous measur<strong>in</strong>g from the Measure menu.<br />
), by press<strong>in</strong>g the key or by activat<strong>in</strong>g the<br />
The <strong>Oscilloscope</strong><br />
40