HP ProBook 4540s Notebook PC Reference Guide - static ...
HP ProBook 4540s Notebook PC Reference Guide - static ...
HP ProBook 4540s Notebook PC Reference Guide - static ...
You also want an ePaper? Increase the reach of your titles
YUMPU automatically turns print PDFs into web optimized ePapers that Google loves.
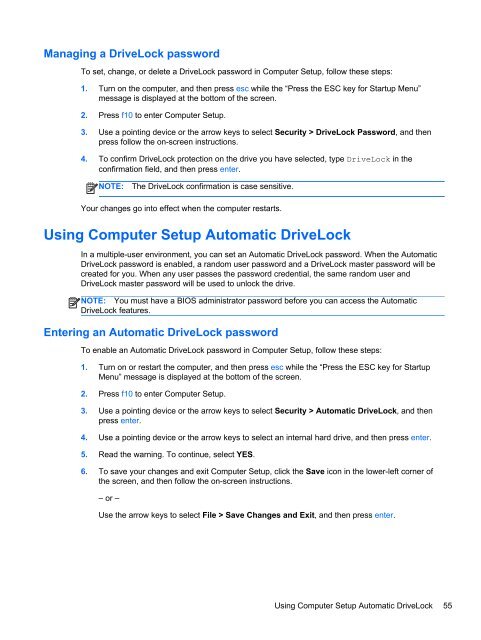
Managing a DriveLock password<br />
To set, change, or delete a DriveLock password in Computer Setup, follow these steps:<br />
1. Turn on the computer, and then press esc while the “Press the ESC key for Startup Menu”<br />
message is displayed at the bottom of the screen.<br />
2. Press f10 to enter Computer Setup.<br />
3. Use a pointing device or the arrow keys to select Security > DriveLock Password, and then<br />
press follow the on-screen instructions.<br />
4. To confirm DriveLock protection on the drive you have selected, type DriveLock in the<br />
confirmation field, and then press enter.<br />
NOTE:<br />
The DriveLock confirmation is case sensitive.<br />
Your changes go into effect when the computer restarts.<br />
Using Computer Setup Automatic DriveLock<br />
In a multiple-user environment, you can set an Automatic DriveLock password. When the Automatic<br />
DriveLock password is enabled, a random user password and a DriveLock master password will be<br />
created for you. When any user passes the password credential, the same random user and<br />
DriveLock master password will be used to unlock the drive.<br />
NOTE: You must have a BIOS administrator password before you can access the Automatic<br />
DriveLock features.<br />
Entering an Automatic DriveLock password<br />
To enable an Automatic DriveLock password in Computer Setup, follow these steps:<br />
1. Turn on or restart the computer, and then press esc while the “Press the ESC key for Startup<br />
Menu” message is displayed at the bottom of the screen.<br />
2. Press f10 to enter Computer Setup.<br />
3. Use a pointing device or the arrow keys to select Security > Automatic DriveLock, and then<br />
press enter.<br />
4. Use a pointing device or the arrow keys to select an internal hard drive, and then press enter.<br />
5. Read the warning. To continue, select YES.<br />
6. To save your changes and exit Computer Setup, click the Save icon in the lower-left corner of<br />
the screen, and then follow the on-screen instructions.<br />
– or –<br />
Use the arrow keys to select File > Save Changes and Exit, and then press enter.<br />
Using Computer Setup Automatic DriveLock 55


