SolarEdge
SolarEdge Installation Guide â MAN-01-00057-2.3
SolarEdge Installation Guide â MAN-01-00057-2.3

You also want an ePaper? Increase the reach of your titles
YUMPU automatically turns print PDFs into web optimized ePapers that Google loves.
Connecting the Strings to the DC Safety Unit<br />
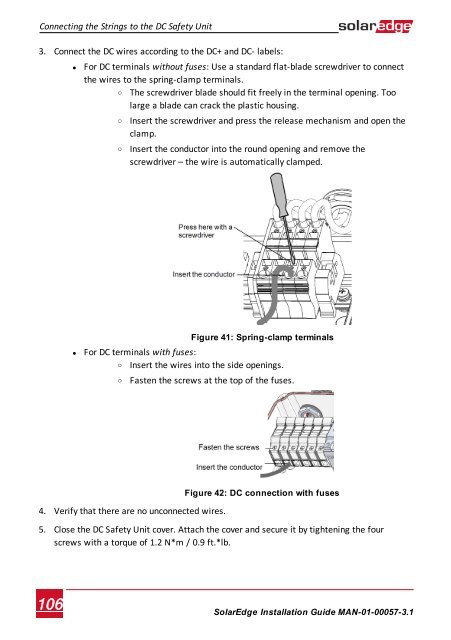
3. Connect the DC wires according to the DC+ and DC- labels:<br />
• For DC terminals without fuses: Use a standard flat-blade screwdriver to connect<br />
the wires to the spring-clamp terminals.<br />
o The screwdriver blade should fit freely in the terminal opening. Too<br />
large a blade can crack the plastic housing.<br />
o<br />
o<br />
Insert the screwdriver and press the release mechanism and open the<br />
clamp.<br />
Insert the conductor into the round opening and remove the<br />
screwdriver – the wire is automatically clamped.<br />
Figure 41: Spring-clamp terminals<br />
• For DC terminals with fuses:<br />
o Insert the wires into the side openings.<br />
o<br />
Fasten the screws at the top of the fuses.<br />
4. Verify that there are no unconnected wires.<br />
Figure 42: DC connection with fuses<br />
5. Close the DC Safety Unit cover. Attach the cover and secure it by tightening the four<br />
screws with a torque of 1.2 N*m / 0.9 ft.*lb.<br />
106<br />
<strong>SolarEdge</strong>-Installation Guide MAN-01-00057-3.1