SolarEdge
SolarEdge Installation Guide â MAN-01-00057-2.3
SolarEdge Installation Guide â MAN-01-00057-2.3

You also want an ePaper? Increase the reach of your titles
YUMPU automatically turns print PDFs into web optimized ePapers that Google loves.
Chapter 7: Setting Up Communication<br />
Verifying the Connection<br />
After connecting and configuring a communication option, perform the following steps to<br />
check that the connection to the monitoring server has been successfully established.<br />
1. Close the inverter cover: Attach the inverter cover and secure it by tightening the screws<br />
with a torque of 9.0 N*m/ 6.6 lb.*ft. For proper sealing, first tighten the corner screws<br />
and then the two central screws (see also Figure 16).<br />
2. Turn ON the AC to the inverter by turning ON the circuit breaker on the main distribution<br />
panel.<br />
3. Wait for the inverter to connect to the <strong>SolarEdge</strong> monitoring portal. This may take up to<br />
two minutes.<br />
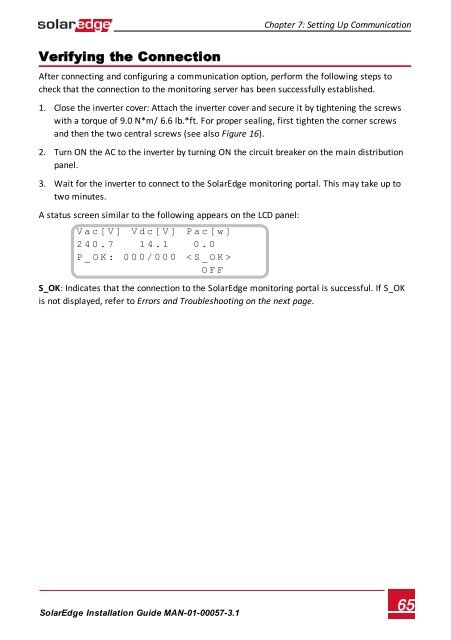
A status screen similar to the following appears on the LCD panel:<br />
V a c [ V ] V d c [ V ] P a c [ w ]<br />
2 4 0 . 7 1 4 . 1 0 . 0<br />
P _ O K : 0 0 0 / 0 0 0 < S _ O K ><br />
- - - - - - - - - - - - - - - O F F<br />
S_OK: Indicates that the connection to the <strong>SolarEdge</strong> monitoring portal is successful. If S_OK<br />
is not displayed, refer to Errors and Troubleshooting on the next page.<br />
<strong>SolarEdge</strong>-Installation Guide MAN-01-00057-3.1<br />
65