1 Surgery CAMLOG Compendium
1 Surgery CAMLOG Compendium
1 Surgery CAMLOG Compendium

Create successful ePaper yourself
Turn your PDF publications into a flip-book with our unique Google optimized e-Paper software.
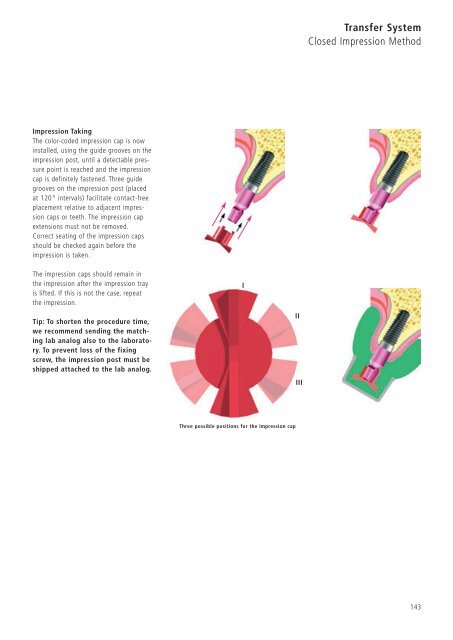
Impression Taking<br />
The color-coded impression cap is now<br />
installed, using the guide grooves on the<br />
impression post, until a detectable pressure<br />
point is reached and the impression<br />
cap is definitely fastened. Three guide<br />
grooves on the impression post (placed<br />
at 120° intervals) facilitate contact-free<br />
placement relative to adjacent impression<br />
caps or teeth. The impression cap<br />
extensions must not be removed.<br />
Correct seating of the impression caps<br />
should be checked again before the<br />
impression is taken.<br />
The impression caps should remain in<br />
the impression after the impression tray<br />
is lifted. If this is not the case, repeat<br />
the impression.<br />
Tip: To shorten the procedure time,<br />
we recommend sending the matching<br />
lab analog also to the laboratory.<br />
To prevent loss of the fixing<br />
screw, the impression post must be<br />
shipped attached to the lab analog.<br />
Three possible positions for the impression cap<br />
I<br />
II<br />
III<br />
Transfer System<br />
Closed Impression Method<br />
143