1 Surgery CAMLOG Compendium
1 Surgery CAMLOG Compendium
1 Surgery CAMLOG Compendium

Create successful ePaper yourself
Turn your PDF publications into a flip-book with our unique Google optimized e-Paper software.
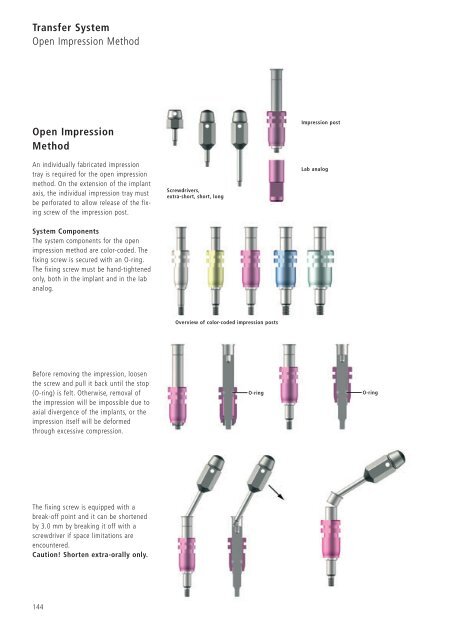
Transfer System<br />
Open Impression Method<br />
Open Impression<br />
Method<br />
An individually fabricated impression<br />
tray is required for the open impression<br />
method. On the extension of the implant<br />
axis, the individual impression tray must<br />
be perforated to allow release of the fixing<br />
screw of the impression post.<br />
System Components<br />
The system components for the open<br />
impression method are color-coded. The<br />
fixing screw is secured with an O-ring.<br />
The fixing screw must be hand-tightened<br />
only, both in the implant and in the lab<br />
analog.<br />
Before removing the impression, loosen<br />
the screw and pull it back until the stop<br />
(O-ring) is felt. Otherwise, removal of<br />
the impression will be impossible due to<br />
axial divergence of the implants, or the<br />
impression itself will be deformed<br />
through excessive compression.<br />
The fixing screw is equipped with a<br />
break-off point and it can be shortened<br />
by 3.0 mm by breaking it off with a<br />
screwdriver if space limitations are<br />
encountered.<br />
Caution! Shorten extra-orally only.<br />
144<br />
Screwdrivers,<br />
extra-short, short, long<br />
Overview of color-coded impression posts<br />
Impression post<br />
Lab analog<br />
O-ring O-ring