RECIPROC® UPGRADE - Vdw-dental.com
RECIPROC® UPGRADE - Vdw-dental.com
RECIPROC® UPGRADE - Vdw-dental.com

Create successful ePaper yourself
Turn your PDF publications into a flip-book with our unique Google optimized e-Paper software.
47<br />
NOTE<br />
The USB port (Fig. 3, F) is used to install<br />
software updates or perform maintenance<br />
on the device. This port is only to be used<br />
by authorised service personnel and is<br />
covered by a label reading “ONLY FOR<br />
SERVICE DO NOT REMOVE” on delivery.<br />
The label may only be removed by service<br />
personnel. The only exeption being the Upgrade<br />
with Software R 1.0, which can be<br />
performed by you, following the VDW.GOLD ®<br />
Upgrade Instructions.<br />
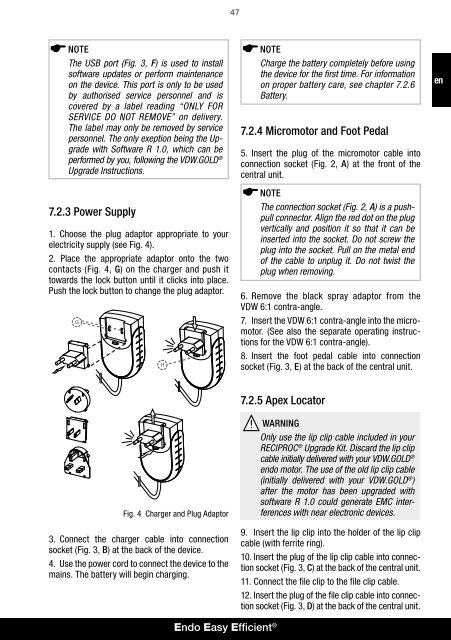
7.2.3 Power Supply<br />
1. Choose the plug adaptor appropriate to your<br />
electricity supply (see Fig. 4).<br />
2. Place the appropriate adaptor onto the two<br />
contacts (Fig. 4, G) on the charger and push it<br />
towards the lock button until it clicks into place.<br />
Push the lock button to change the plug adaptor.<br />
G<br />
H<br />
NOTE<br />
Charge the battery <strong>com</strong>pletely before using<br />
the device for the first time. For information<br />
on proper battery care, see chapter 7.2.6<br />
Battery.<br />
7.2.4 Micromotor and Foot Pedal<br />
5. Insert the plug of the micromotor cable into<br />
connection socket (Fig. 2, A) at the front of the<br />
central unit.<br />
NOTE<br />
The connection socket (Fig. 2, A) is a pushpull<br />
connector. Align the red dot on the plug<br />
vertically and position it so that it can be<br />
inserted into the socket. Do not screw the<br />
plug into the socket. Pull on the metal end<br />
of the cable to unplug it. Do not twist the<br />
plug when removing.<br />
6. Remove the black spray adaptor from the<br />
VDW 6:1 contra-angle.<br />
7. Insert the VDW 6:1 contra-angle into the micromotor.<br />
(See also the separate operating instructions<br />
for the VDW 6:1 contra-angle).<br />
8. Insert the foot pedal cable into connection<br />
socket (Fig. 3, E) at the back of the central unit.<br />
en<br />
Fig. 4 Charger and Plug Adaptor<br />
3. Connect the charger cable into connection<br />
socket (Fig. 3, B) at the back of the device.<br />
4. Use the power cord to connect the device to the<br />
mains. The battery will begin charging.<br />
7.2.5 Apex Locator<br />
WARNING<br />
Only use the lip clip cable included in your<br />
RECIPROC ® Upgrade Kit. Discard the lip clip<br />
cable initially delivered with your VDW.GOLD ®<br />
endo motor. The use of the old lip clip cable<br />
(initially delivered with your VDW.GOLD ® )<br />
after the motor has been upgraded with<br />
software R 1.0 could generate EMC interferences<br />
with near electronic devices.<br />
9. Insert the lip clip into the holder of the lip clip<br />
cable (with ferrite ring).<br />
10. Insert the plug of the lip clip cable into connection<br />
socket (Fig. 3, C) at the back of the central unit.<br />
11. Connect the file clip to the file clip cable.<br />
12. Insert the plug of the file clip cable into connection<br />
socket (Fig. 3, D) at the back of the central unit.<br />
Endo Easy Efficient ®