- Page 1 and 2:
P R O J E C T M A N U A LFORBuffalo
- Page 3 and 4:
Buffalo Wild WingsSECTION 00010 - T
- Page 5 and 6:
Buffalo Wild WingsDIVISION 9 - FINI
- Page 7 and 8:
Material Identification Codesfor us
- Page 9 and 10:
SECTION 04810 - UNIT MASONRY ASSEMB
- Page 11 and 12:
Plastic Laminate(PLAM1): Wilsonart
- Page 13 and 14:
Sealant Schedule - Sealant types wi
- Page 15 and 16:
Hardware Furnished by OwnerGROUP 13
- Page 17 and 18:
SECTION 09680 - CARPETIndicated on
- Page 19 and 20:
SECTION 10810 - TOILET ACCESSORIESI
- Page 21 and 22:
Buffalo Wild WingsSECTION 00100 - B
- Page 23 and 24:
CONTRACT FORMSC. Read carefully and
- Page 25 and 26:
PART 3 - CONTRACT EXECUTION3.01 POS
- Page 27 and 28:
Buffalo Wild WingsSECTION 00220 - S
- Page 29 and 30:
Buffalo Wild WingsSECTION 01200 - P
- Page 31 and 32:
Buffalo Wild WingsD. Product Data:
- Page 33 and 34:
Buffalo Wild WingsH. Testing Agency
- Page 35 and 36:
Buffalo Wild WingsF. Collect waste
- Page 37 and 38:
Buffalo Wild Wingsor trademark, pro
- Page 39 and 40:
Buffalo Wild WingsSECTION 01700 - E
- Page 41 and 42: Buffalo Wild WingsD. Owner will re-
- Page 43 and 44: Buffalo Wild WingsPART 2 PRODUCTSNo
- Page 45 and 46: Buffalo Wild Wings1.07 WARRANTYA. S
- Page 47 and 48: Buffalo Wild WingsSECTION 03300 - C
- Page 49 and 50: Buffalo Wild Wings2.03 CONCRETE MAT
- Page 51 and 52: Buffalo Wild WingsD. Where new conc
- Page 53 and 54: Buffalo Wild WingsD. Compressive St
- Page 55 and 56: Buffalo Wild Wings1.05 DELIVERY, ST
- Page 57 and 58: Buffalo Wild WingsPART 1 GENERAL1.0
- Page 59 and 60: Buffalo Wild Wings2.05 GROUT MIXING
- Page 61 and 62: Buffalo Wild WingsB. Maintain mater
- Page 63 and 64: Buffalo Wild WingsD. Cavity Mortar
- Page 65 and 66: Buffalo Wild WingsPART 1 GENERAL1.0
- Page 67 and 68: Buffalo Wild WingsE. Shear Stud Con
- Page 69 and 70: Buffalo Wild WingsSECTION 05210 - S
- Page 71 and 72: Buffalo Wild Wings2.05 CLEANING AND
- Page 73 and 74: Buffalo Wild WingsPART 1 GENERAL1.0
- Page 75 and 76: Buffalo Wild WingsE. At deck openin
- Page 77 and 78: Buffalo Wild Wings1.06 DELIVERY, ST
- Page 79 and 80: Buffalo Wild WingsSECTION 05500 - M
- Page 81 and 82: Buffalo Wild WingsB. RTU roof reinf
- Page 83 and 84: Buffalo Wild WingsSECTION 06100 - R
- Page 85 and 86: Buffalo Wild WingsB. Materials:1. (
- Page 87 and 88: Buffalo Wild WingsSECTION 06200 - F
- Page 89 and 90: Buffalo Wild WingsC. Cope all insid
- Page 91: Buffalo Wild Wings1.06 DELIVERY, ST
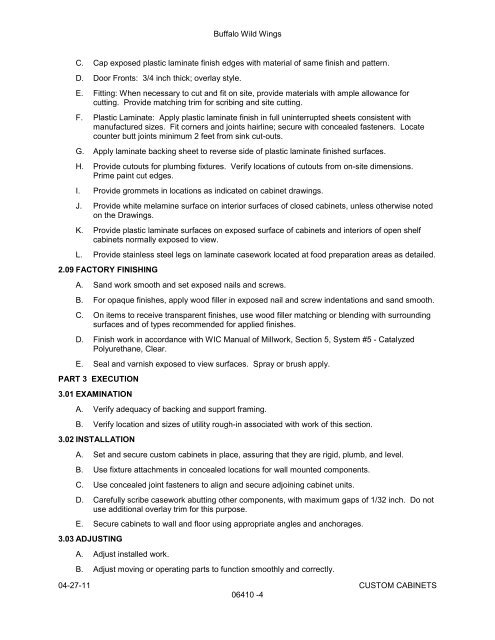
- Page 95 and 96: Buffalo Wild WingsSECTION 06415 - C
- Page 97 and 98: Buffalo Wild WingsB. Attach plastic
- Page 99 and 100: Buffalo Wild WingsPART 3 EXECUTION3
- Page 101 and 102: Buffalo Wild WingsPART 2 PRODUCTS2.
- Page 103 and 104: Buffalo Wild WingsG. Repair tears,
- Page 105 and 106: Buffalo Wild Wings2.02 COLD-APPLIED
- Page 107 and 108: Buffalo Wild WingsSECTION 07212 - B
- Page 109 and 110: Buffalo Wild Wings3.02 DELIVERY AND
- Page 111 and 112: Buffalo Wild WingsC. ICC Evaluation
- Page 113 and 114: Buffalo Wild WingsB. Water-Resistiv
- Page 115 and 116: Buffalo Wild Wings3.05 TRIM INSTALL
- Page 117 and 118: Buffalo Wild WingsG. Double Base-Co
- Page 119 and 120: Buffalo Wild WingsSECTION 07260 - A
- Page 121 and 122: Buffalo Wild WingsPART 1 GENERAL1.0
- Page 123 and 124: Buffalo Wild WingsC. Roofing Felt:
- Page 125 and 126: Buffalo Wild WingsPART 1 - GENERAL1
- Page 127 and 128: Buffalo Wild WingsPART 2 - PRODUCTS
- Page 129 and 130: Buffalo Wild Wings3.02 PREPARATIONA
- Page 131 and 132: Buffalo Wild WingsPART 1 GENERAL1.0
- Page 133 and 134: Buffalo Wild WingsK. Roof Walkway P
- Page 135 and 136: Buffalo Wild WingsD. Roof Walkway P
- Page 137 and 138: Buffalo Wild Wings2.02 ACCESSORIESA
- Page 139 and 140: Buffalo Wild WingsPART 1 GENERAL1.0
- Page 141 and 142: Buffalo Wild WingsSECTION 07900 - J
- Page 143 and 144:
Buffalo Wild WingsD. (SLNT3) Sanita
- Page 145 and 146:
Buffalo Wild WingsSECTION 08110 - H
- Page 147 and 148:
Buffalo Wild WingsC. Interior Frame
- Page 149 and 150:
Buffalo Wild WingsSECTION 08211 - F
- Page 151 and 152:
Buffalo Wild WingsF. Provide edge c
- Page 153 and 154:
Buffalo Wild WingsPART 3 EXECUTION3
- Page 155 and 156:
Buffalo Wild WingsPART 1 GENERAL1.0
- Page 157 and 158:
Buffalo Wild WingsPART 2 PRODUCTS2.
- Page 159 and 160:
Buffalo Wild Wings3.02 INSTALLATION
- Page 161 and 162:
Buffalo Wild WingsSECTION 08710 - D
- Page 163 and 164:
Buffalo Wild Wings2.03 DOOR HARDWAR
- Page 165 and 166:
Buffalo Wild Wings3.02 INSTALLATION
- Page 167 and 168:
Buffalo Wild Wings1 Closer 1461 x 1
- Page 169 and 170:
Buffalo Wild Wings1.06 ENVIRONMENTA
- Page 171 and 172:
Buffalo Wild Wings3.03 INSTALLATION
- Page 173 and 174:
Buffalo Wild WingsPART 1 GENERAL1.0
- Page 175 and 176:
Buffalo Wild WingsG. Senergy STUCCO
- Page 177 and 178:
Buffalo Wild Wings2. Second (Brown)
- Page 179 and 180:
Buffalo Wild Wings1.04 QUALITY ASSU
- Page 181 and 182:
Buffalo Wild WingsB. Studs: Space s
- Page 183 and 184:
Buffalo Wild WingsPART 1 GENERAL1.0
- Page 185 and 186:
Buffalo Wild WingsC. Epoxy Grout: a
- Page 187 and 188:
Buffalo Wild WingsSECTION 09511 - S
- Page 189 and 190:
Buffalo Wild Wings2.04 ACCESSORIESA
- Page 191 and 192:
Buffalo Wild WingsSECTION 09650 - R
- Page 193 and 194:
Buffalo Wild WingsPART 2 PRODUCTS2.
- Page 195 and 196:
Buffalo Wild WingsSECTION 09680 - C
- Page 197 and 198:
Buffalo Wild WingsSECTION 09720 - W
- Page 199 and 200:
Buffalo Wild Wings4. Semigloss: ref
- Page 201 and 202:
Buffalo Wild WingsC. Volatile Organ
- Page 203 and 204:
Buffalo Wild WingsK. Gypsum Wallboa
- Page 205 and 206:
Buffalo Wild WingsPART 1 GENERAL1.0
- Page 207 and 208:
Buffalo Wild Wings2.02 MATERIALSA.
- Page 209 and 210:
Buffalo Wild WingsSECTION 10010 - M
- Page 211 and 212:
Buffalo Wild WingsSECTION 10210 - W
- Page 213 and 214:
Buffalo Wild Wings3.04 CLEANINGA. S
- Page 215 and 216:
Buffalo Wild WingsSECTION 10445 - D
- Page 217 and 218:
Buffalo Wild Wings2.04 FINISHINGA.
- Page 219 and 220:
Buffalo Wild Wings2.03 FIRE EXTINGU
- Page 221 and 222:
Buffalo Wild WingsC. Exposed Fasten
- Page 223 and 224:
Buffalo Wild Wings2.04 TOILET ACCES
- Page 225 and 226:
Buffalo Wild WingsSECTION 12493 - W
- Page 227 and 228:
Buffalo Wild Wings3.02 INSTALLATION
- Page 229 and 230:
3. Mechanical Drawings are diagramm
- Page 231 and 232:
8. The Contractor shall properly pr
- Page 233 and 234:
2. A maintenance and lubrication sc
- Page 235 and 236:
the work of other trades shall be r
- Page 237 and 238:
2.4 ACCESS PANELSA. The Contractor
- Page 239 and 240:
D. Pavement, Curb, and Sidewalk Rep
- Page 241 and 242:
B. Concealed Piping: Bare and insul
- Page 243 and 244:
SECTION 15150 - PIPING MATERIALS AN
- Page 245 and 246:
2.3 BACKFLOW PREVENTERSA. Acceptabl
- Page 247 and 248:
L. Pipe Supports:1. Hangers shall a
- Page 249 and 250:
2. Exposed areas shall be furnished
- Page 251 and 252:
SECTION 15300 - FIRE SPRINKLER SYST
- Page 253 and 254:
PART 3. - EXECUTION3.1 A. The desig
- Page 255 and 256:
PART 2. - PRODUCTS2.1 A. Miscellane
- Page 257 and 258:
D. Avoid installing sanitary waste
- Page 259 and 260:
3. Janitors Receptors, Sterns-Willi
- Page 261 and 262:
SECTION 15700 - HEATING, VENTILATIN
- Page 263 and 264:
C. Direct Fired Make-Up Air Unit (M
- Page 265 and 266:
PART 3. - EXECUTION3.1 GENERALA. Ki
- Page 267 and 268:
2. RTU-3CO2 sensor, the outside air
- Page 269 and 270:
E. Cooling:required shall not be le
- Page 271 and 272:
3. Electrical Drawings are diagramm
- Page 273 and 274:
1.5 SUBMITTALSA. Within fifteen day
- Page 275 and 276:
B. The Contractor shall procure all
- Page 277 and 278:
SECTION 16030 - CUTTING AND PATCHIN
- Page 279 and 280:
PART 3. - EXECUTION3.1 GENERAL REQU
- Page 281 and 282:
B. Type: Conduit shall be rigid gal
- Page 283 and 284:
3. Conduits shall not obstruct head
- Page 285 and 286:
3.5 EMPTY CONDUITSA. Identification
- Page 287 and 288:
5. Boxes in finished ceiling constr
- Page 289 and 290:
SECTION 16117- SAFETY SWITCHESPART
- Page 291 and 292:
SECTION 16120 - WIRE AND CABLE (600
- Page 293 and 294:
PART 3. - EXECUTION3.1 GENERAL WIRI
- Page 295 and 296:
2.4 CONVENIENCE OUTLETSA. General R
- Page 297 and 298:
SECTION 16150 - ELECTRICAL CONNECTI
- Page 299 and 300:
1. Conductors: Copper cable, strand
- Page 301 and 302:
SECTION 16470 - PANELBOARDSPART 1.
- Page 303 and 304:
B. Circuit Identification:1. Circui
- Page 305:
1. Recessed fixtures designed expre