- Page 1 and 2:
6RXUFH ,QWHJULW\ (QWHUSULVH (GLWLRQ
- Page 3 and 4: Table of Contents Chapters 1 Welcom
- Page 5 and 6: Table of Contents Working With Subp
- Page 7 and 8: Table of Contents 9 Viewing and Edi
- Page 9 and 10: Welcome to Source Integrity Enterpr
- Page 11 and 12: Related Documentation Related Docum
- Page 13 and 14: Typographical Conventions Typograph
- Page 15 and 16: What’s New in This Release Assump
- Page 17 and 18: Professional Services Professional
- Page 19 and 20: To Do This … See … Where To Go
- Page 21 and 22: Understanding Source Integrity 2 KE
- Page 23 and 24: File and Object Histories File and
- Page 25 and 26: What Is a Project Member? What Is a
- Page 27 and 28: Project Checkpointing The member h
- Page 29 and 30: Working With Variants and Developme
- Page 31 and 32: Getting Started Using Source Integr
- Page 33 and 34: NOTE For UNIX, follow the written
- Page 35 and 36: Installing the Integrity Client 8 I
- Page 37 and 38: Configuring Environment Variables f
- Page 39 and 40: Understanding Access Control Lists
- Page 41 and 42: 3 Click Permissions. Before You Sta
- Page 43 and 44: IMPORTANT Starting the Source Integ
- Page 45 and 46: To log in using the graphical user
- Page 47 and 48: The MKS Integrity Server home page
- Page 49 and 50: General Preferences Setting Prefere
- Page 51 and 52: Connection Preferences Setting Pref
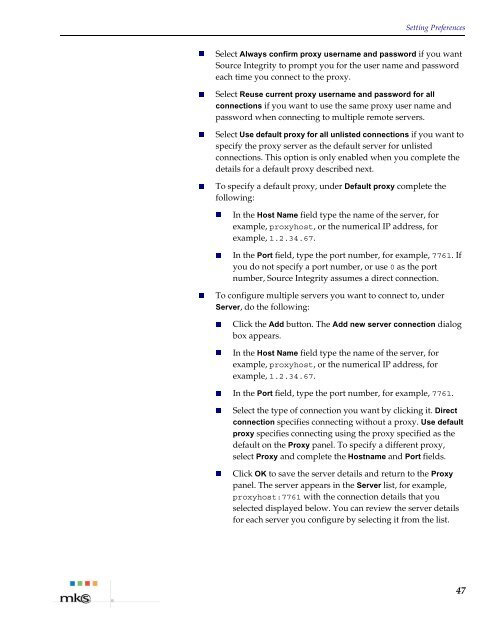
- Page 53: Setting Preferences To be prompted
- Page 57 and 58: Command Options Setting Preferences
- Page 59 and 60: Command Options Apply Change Packag
- Page 61 and 62: Command Options Setting Preferences
- Page 63 and 64: Command Options Setting Preferences
- Page 65 and 66: Command Options Setting Preferences
- Page 67 and 68: Command Options View Preferences Se
- Page 69 and 70: View Options Setting Preferences Ch
- Page 71 and 72: View Options Setting Preferences Lo
- Page 73 and 74: View Options Setting Preferences Sa
- Page 75 and 76: Managing Integrations Select Custo
- Page 77 and 78: 5 To disable the selected integrati
- Page 79 and 80: Source Integrity Interfaces 4 KEY T
- Page 81 and 82: Source Integrity Graphical User Int
- Page 83 and 84: Printing Lists and Views Source Int
- Page 85 and 86: To sort a column in the graphical u
- Page 87 and 88: Source Integrity Graphical User Int
- Page 89 and 90: Enter the following information int
- Page 91 and 92: Using Filters Source Integrity Grap
- Page 93 and 94: Source Integrity Graphical User Int
- Page 95 and 96: Window Type Opened Associated Envir
- Page 97 and 98: Application Window Source Integrity
- Page 99 and 100: Using Filters Filter List Source In
- Page 101 and 102: Viewing Available CLI Commands Usin
- Page 103 and 104: MKS Visual Difference Interface App
- Page 105 and 106:
NOTE Under the View menu, the follo
- Page 107 and 108:
Preferences MKS Visual Difference I
- Page 109 and 110:
MKS Visual Merge Interface 3 To cha
- Page 111 and 112:
Title Bar MKS Visual Merge Interfac
- Page 113 and 114:
Preferences Shortcut Menu MKS Visua
- Page 115 and 116:
MKS Visual Merge Interface 3 To cha
- Page 117 and 118:
Project and Sandbox Operations KEY
- Page 119 and 120:
The Specify the Project to Create d
- Page 121 and 122:
TIP Working With Projects The Regis
- Page 123 and 124:
Opening or Viewing a Project 4 To d
- Page 125 and 126:
TIP Working With Projects You can a
- Page 127 and 128:
Adding a Subproject Working With Su
- Page 129 and 130:
Working With Subprojects 4 Select o
- Page 131 and 132:
Working With Subprojects Shared sub
- Page 133 and 134:
Working With Subprojects 7 Select o
- Page 135 and 136:
Working With Subprojects When confi
- Page 137 and 138:
Dropping a Subproject Working With
- Page 139 and 140:
Creating a Sandbox Working With San
- Page 141 and 142:
Working With Sandboxes View Sandbo
- Page 143 and 144:
Importing a Sandbox Working With Sa
- Page 145 and 146:
TIP Working With Sandboxes The Regi
- Page 147 and 148:
Viewing Which Sandbox Locked a Memb
- Page 149 and 150:
Working With Sandboxes To prevent p
- Page 151 and 152:
Removing a Development Path Working
- Page 153 and 154:
Member Operations 6 KEY TERMS: memb
- Page 155 and 156:
To add members in the graphical use
- Page 157 and 158:
Managing Project Members In the Re
- Page 159 and 160:
Managing Project Members The newly
- Page 161 and 162:
Managing Project Members In the Da
- Page 163 and 164:
Importing Members Managing Project
- Page 165 and 166:
6 Under Options, you can specify th
- Page 167 and 168:
Managing Project Members 3 Choose t
- Page 169 and 170:
Performing Member Operations 4 To d
- Page 171 and 172:
Checking Out a Member Performing Me
- Page 173 and 174:
Performing Member Operations 3 Clic
- Page 175 and 176:
Performing Member Operations 3 Clic
- Page 177 and 178:
Check Out Dialog Box Tab Revision t
- Page 179 and 180:
Performing Member Operations Change
- Page 181 and 182:
Performing Member Operations branch
- Page 183 and 184:
TIP Performing Member Operations Cl
- Page 185 and 186:
NOTE Performing Member Operations T
- Page 187 and 188:
Check In Dialog Box Options Check I
- Page 189 and 190:
Renaming a Member That Is the Tip R
- Page 191 and 192:
Discarding Changes to a Member Perf
- Page 193 and 194:
Performing Member Operations To res
- Page 195 and 196:
3 Configure the following options a
- Page 197 and 198:
Deferring Member Operations Deferri
- Page 199 and 200:
Cancelling Deferred Operations Resy
- Page 201 and 202:
Comparing Differences Visual Differ
- Page 203 and 204:
Using Keywords The following Source
- Page 205 and 206:
Using Keywords The following table
- Page 207 and 208:
Using Change Packages 7 KEY TERMS:
- Page 209 and 210:
Why Use Change Packages? Change pac
- Page 211 and 212:
Creating a Change Package 5 When al
- Page 213 and 214:
4 Click OK. Adding Entries to a Cha
- Page 215 and 216:
Finding Change Packages Managing Ch
- Page 217 and 218:
Managing Change Packages Descripti
- Page 219 and 220:
Viewing Change Package Details and
- Page 221 and 222:
Managing Change Packages 3 From the
- Page 223 and 224:
Managing Change Packages To view a
- Page 225 and 226:
Editing a Change Package Managing C
- Page 227 and 228:
Closing a Change Package 4 Edit the
- Page 229 and 230:
Submitting Change Packages Submitti
- Page 231 and 232:
Viewing Change Package Entry Member
- Page 233 and 234:
Viewing and Editing Projects, Sandb
- Page 235 and 236:
TIP Controlling Projects In the Sou
- Page 237 and 238:
4 In the Variable field, enter a va
- Page 239 and 240:
Viewing a Project History 5 Click D
- Page 241 and 242:
Opening a Build Project Adding Proj
- Page 243 and 244:
Deleting Project Labels Promoting a
- Page 245 and 246:
Checkpointing a Project 2 Do one of
- Page 247 and 248:
Controlling Projects 3 Click an opt
- Page 249 and 250:
Controlling Projects Restoring a pr
- Page 251 and 252:
Controlling Projects The Labels tab
- Page 253 and 254:
Comparing Project Revisions Projec
- Page 255 and 256:
Controlling Projects An example of
- Page 257 and 258:
To view project differences in the
- Page 259 and 260:
Controlling Sandboxes Viewing Gener
- Page 261 and 262:
Taking Sandbox Snapshots To view pr
- Page 263 and 264:
Controlling Sandboxes the current r
- Page 265 and 266:
The Advanced tab specifies advanced
- Page 267 and 268:
Controlling Members Created By is
- Page 269 and 270:
2 Select Member > Member Informatio
- Page 271 and 272:
Updating a Member’s Revision Cont
- Page 273 and 274:
Controlling Members Member Branch
- Page 275 and 276:
Deleting Member Labels Controlling
- Page 277 and 278:
Demoting Members Controlling Member
- Page 279 and 280:
Controlling Members You can change
- Page 281 and 282:
Generating Reports About the Report
- Page 283 and 284:
This report type offers two additio
- Page 285 and 286:
Creating a Report Source Integrity
- Page 287 and 288:
Viewing and Editing Member Historie
- Page 289 and 290:
NOTE Viewing a Member History If th
- Page 291 and 292:
NOTE Viewing and Editing Archive In
- Page 293 and 294:
Viewing and Editing Revision Inform
- Page 295 and 296:
Viewing an Annotated Revision To vi
- Page 297 and 298:
Viewing and Editing Revision Labels
- Page 299 and 300:
Deleting Revision Labels Viewing a
- Page 301 and 302:
Demoting Revisions Demoting Revisio
- Page 303 and 304:
Unlocking Revisions 3 Configure the
- Page 305 and 306:
Locking Multiple Revisions You are
- Page 307 and 308:
You can perform the following tasks
- Page 309 and 310:
Deleting Revisions If you know you
- Page 311 and 312:
The MKS Visual Difference window op
- Page 313 and 314:
Branching and Merging Revisions KEY
- Page 315 and 316:
Branching Revisions 3 Click the des
- Page 317 and 318:
2 Select Member > Working File > Ma
- Page 319 and 320:
Merging Branched Revisions Merging
- Page 321 and 322:
NOTE Merging Branched Revisions If
- Page 323 and 324:
5 Under Options complete the follow
- Page 325 and 326:
Merging Branched Revisions 3 Specif
- Page 327 and 328:
Automatic Merging on Check Out Merg
- Page 329 and 330:
2 Do one of the following: Select
- Page 331 and 332:
Merging Revisions 3 Specify the rev
- Page 333 and 334:
Merging Revisions 3 Specify which o
- Page 335 and 336:
Merging Revisions 7 Enter the file
- Page 337 and 338:
Saving Merge Results Merging Revisi
- Page 339 and 340:
Merging by Nonconflicting Blocks Me
- Page 341 and 342:
Saving Merge Results Merging Revisi
- Page 343 and 344:
Merging in the Command Line Interfa
- Page 345 and 346:
Resolving Merges Manually allows y
- Page 347 and 348:
The Integrity Manager Integration K
- Page 349 and 350:
How the Integration Works Only iss
- Page 351 and 352:
Creating a Change Package for an Is
- Page 353 and 354:
Adding Entries to an Issue’s Chan
- Page 355 and 356:
3 Select Actions > View Issue. Find
- Page 357 and 358:
Advanced Change Package Operations
- Page 359 and 360:
Change Package Methodology Change P
- Page 361 and 362:
Change Package Feature Overview The
- Page 363 and 364:
Using the Apply CP Command If Appl
- Page 365 and 366:
Key Apply CP Concepts How Apply CP
- Page 367 and 368:
Apply CP Backfill List main.c Auror
- Page 369 and 370:
main.c Aurora_Project 1.3 CP 22:1 U
- Page 371 and 372:
Apply CP Backfill Options Using the
- Page 373 and 374:
CP 21:1 CP 22:1 CP 23:1 Aurora_Proj
- Page 375 and 376:
3 To add change packages to the App
- Page 377 and 378:
Tab Table Columns Change Package En
- Page 379 and 380:
Using the Apply CP Command To remov
- Page 381 and 382:
Apply CP Advanced Command Options I
- Page 383 and 384:
Using the Resync CP Command Using t
- Page 385 and 386:
Resync CP Backfill List Using the R
- Page 387 and 388:
Using the Resync CP Command To pick
- Page 389 and 390:
Working on a Variant Resync CP Back
- Page 391 and 392:
utility.c Master Project 1.4 utilit
- Page 393 and 394:
Archive for patch.c Using the Resyn
- Page 395 and 396:
Using the Resync CP Command The Res
- Page 397 and 398:
Tab Table Columns Change Package En
- Page 399 and 400:
Using the Resync CP Command 7 To se
- Page 401 and 402:
Resync CP Advanced Command Options
- Page 403 and 404:
Using the Resync CP Command 10 Sele
- Page 405 and 406:
NOTE Working With a Resolution CP W
- Page 407 and 408:
Key Resolution CP Concepts Working
- Page 409 and 410:
Using a Resolution CP Working With
- Page 411 and 412:
Working With a Resolution CP 4 Sele
- Page 413 and 414:
Using the Resync By CP Command 9 Af
- Page 415 and 416:
Developer 1 then performs the follo
- Page 417 and 418:
A P P E N D I X Views, Windows, and
- Page 419 and 420:
Project and Sandbox Windows (GUI) A
- Page 421 and 422:
Project Window (Web) Project Window
- Page 423 and 424:
Project History Window (GUI) The in
- Page 425 and 426:
Member History Window (GUI) You can
- Page 427 and 428:
Member History Window (Web) Member
- Page 429 and 430:
Graphical History View (GUI) Figure
- Page 431 and 432:
For Operation ... See … Merge “
- Page 433 and 434:
Change Package View (GUI) Change Pa
- Page 435 and 436:
Change Packages View Change Package
- Page 437 and 438:
Registered Projects and Sandboxes D
- Page 439 and 440:
Registered Projects Window (Web) To
- Page 441 and 442:
A P P E N D I X Glossary of Terms A
- Page 443 and 444:
Glossary of Terms demoting You can
- Page 445 and 446:
members of the project and provide
- Page 447 and 448:
Glossary of Terms tip revision The
- Page 449 and 450:
Index A access control list describ
- Page 451 and 452:
preferences 43 to multiple servers
- Page 453 and 454:
menu bar 72 project history window
- Page 455 and 456:
on branch 383 merge results editing
- Page 457 and 458:
comparing 301 deleting 301 deleting
- Page 459 and 460:
panes 97 preferences 99 reverting m


