WSCAD 5.2 - FTP Directory Listing
WSCAD 5.2 - FTP Directory Listing
WSCAD 5.2 - FTP Directory Listing

You also want an ePaper? Increase the reach of your titles
YUMPU automatically turns print PDFs into web optimized ePapers that Google loves.
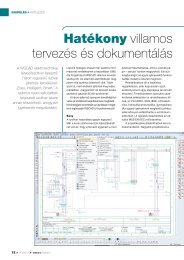
Getting Started<br />
You have the possibility to use 16 additional texts for each symbol. Additionally you<br />
can link each of the 16 additional texts with any data base field.<br />
Hint<br />
Is there a '!' placed at the beginning of a text, the text in the drawing<br />
becomes invisible. Invisible texts you can make visible with the menu item<br />
'view-show all texts'.<br />
Editing Terminals<br />
General<br />
The terminal designations from the terminal strip -X0 cannot all be set<br />
automatically because the automatic process can only generate consecutive<br />
numbers. This also applies to the 'PE' terminals of -X1.<br />
<strong>WSCAD</strong> 5 offers a clear and simple tool to deal with this problem: the Terminal<br />
Browser.<br />
Placing Terminals<br />
Interesting for user Basic - Compact and Professional version<br />
Terminals are components with special features. They can be found in the<br />
Favourites library 'EXAMPLE'.<br />
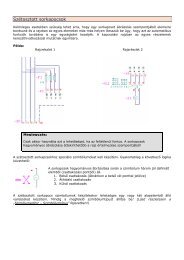
First, the terminal -X0 is to be added to the drawing (this is the numbered<br />
reference name). To view the entire drawing sheet in the drawing frame, change<br />
the viewing scale by pressing either the function key (Fit View) or the <br />
and function keys to zoom in or out.<br />
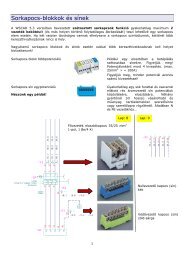
Select the favourites library 'EXAMPLE' and select the component 'Terminal' and<br />
position it. Make sure that the terminal pin exactly matches the end of the line,<br />
overlapping should be avoided (turn Snap on!!). Press the left mouse button to<br />
position the terminal pin. Now the database selection appears, select '870-901'.<br />
Enter a complete reference name (e.g. –X0), so that the automatic functions can<br />
locate the appropriate terminal pins (which could be located on many pages<br />
throughout your diagram) and assign them to one complete terminal strip.<br />
To do this, select the 'Reference name' in the 'Component Parameters' menu,<br />
and you will be prompted, at the bottom of the screen, to input a reference<br />
name. Enter '-X0' and confirm with . Exit from the 'Component<br />
Parameters' menu by clicking with the mouse in the drawing area (or use<br />
).<br />
Hint<br />
The pin numbers entered here are only used in the example drawing.<br />
Normally the terminal pins are placed without numbering because the<br />
automatic function does the numbering for you.<br />
40