Stereo Scan 440 - DCU
Stereo Scan 440 - DCU
Stereo Scan 440 - DCU
You also want an ePaper? Increase the reach of your titles
YUMPU automatically turns print PDFs into web optimized ePapers that Google loves.
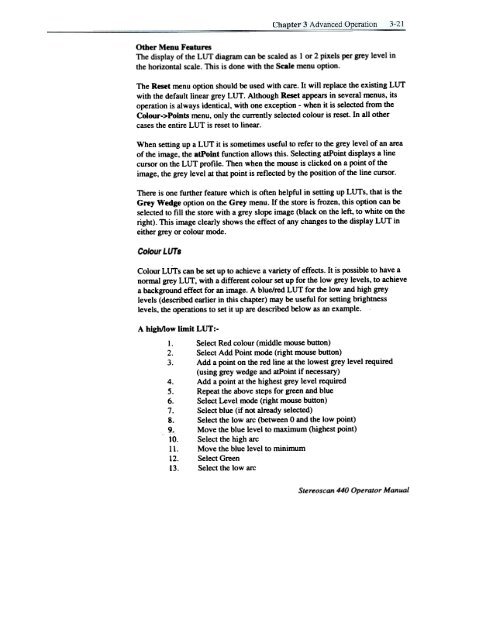
Other Menu Features<br />
The display of the LUT diagram can be scaled as 1 or 2 pixels per grey level in<br />
the horizontal scale. This is done with the Scale menu option.<br />
The Reset menu option should be used with care. It will replace the existing LUT<br />
with the default linear grey LUT. Although Reset appears in several menus, its<br />
operation is always identical, with one exception - when it is selected from the<br />
Colour->Points menu, only the currently selected colour is reset. In all other<br />
cases the entire LUT is reset to linear.<br />
When setting up a LUT it is sometimes useful to refer to the grey level of an area<br />
of the image, the atPoint function allows this. Selecting atPoint displays a line<br />
cursor on the LUT profile. Then when the mouse is clicked on a point of the<br />
image, the grey level at that point is reflected by the position of the line cursor.<br />
There is one further feature which is often helpful in setting up LUTs, that is the<br />
Grey Wedge option on the Grey menu. If the store is frozen, this option can be<br />
selected to fill the store with a grey slope image (black on the left, to white on the<br />
right). This image clearly shows the effect of any changes to the disp.1ay LUT in<br />
either grey or colour mode.<br />
Colour LUTs<br />
Colour LUTs can be set up to achieve a variety of effects. It is possible to have a<br />
normal grey LUT, with a different colour set up for the low grey levels, to achieve<br />
a background effect for an image. A blue/red LUT for the low and high grey<br />
levels (described earlier in this chapter) may be useful for setting brightness<br />
levels, the operations to set it up are described below as an example.<br />
A higbllow limit LUT:-<br />
1. Select Red colour (middle mouse button)<br />
2. Select Add Point mode (right mouse button)<br />
3. Add a point on the red line at the lowest grey level required<br />
(using grey wedge and atPoint if necessary)<br />
4. Add a point at the highest grey level required<br />
5. Repeat the above steps for green and blue<br />
6. Select Level mode (right mouse button)<br />
7. Select blue (if not already selected)<br />
8. Select the low arc (between 0 and the low point)<br />
9~ Move the blue level to maximum (highest point)<br />
10. Select the high arc<br />
11. Move the blue level to minimum<br />
12. Select Green<br />
13. Select the low arc<br />
<strong>Stereo</strong>scan <strong>440</strong> Operator Manual


