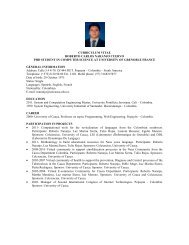
Advice for the Project Management Professional (PMP)
Advice for the Project Management Professional (PMP)
Advice for the Project Management Professional (PMP)

Create successful ePaper yourself
Turn your PDF publications into a flip-book with our unique Google optimized e-Paper software.
Licensed to:<br />
Select All<br />
button<br />
5. Examine <strong>the</strong> Table: Schedule view. Click View on <strong>the</strong> Menu bar, move your<br />
mouse to Table: Entry, and <strong>the</strong>n click Schedule in <strong>the</strong> cascading menu to <strong>the</strong><br />
right. Notice that <strong>the</strong> columns to <strong>the</strong> left of <strong>the</strong> Gantt chart now display more<br />
detailed schedule in<strong>for</strong>mation. Also notice that all of <strong>the</strong> text in <strong>the</strong> Task<br />
Name column is not visible. You can widen <strong>the</strong> column by moving <strong>the</strong> mouse<br />
to <strong>the</strong> right of <strong>the</strong> Task Name column and double-clicking <strong>the</strong> resize pointer<br />
. You can also move <strong>the</strong> split bar to <strong>the</strong> right to reveal more columns.<br />
6. Right-click <strong>the</strong> Select All button to access different table views. Move your<br />
mouse to <strong>the</strong> Select All button to <strong>the</strong> left of <strong>the</strong> Task Name column symbol,<br />
and <strong>the</strong>n right-click with your mouse. A shortcut menu to different table views<br />
displays, as shown in Figure A-15. Experiment with o<strong>the</strong>r table views, <strong>the</strong>n<br />
return to <strong>the</strong> Table: Entry view.<br />
FIGURE A-15 Changing Table Views<br />
Schedule table view<br />
7. Explore <strong>the</strong> Reports feature. Click Report on <strong>the</strong> Menu bar, and <strong>the</strong>n click<br />
Reports. The Reports dialog box displays, as shown in Figure A-16.<br />
8. View <strong>the</strong> <strong>Project</strong> Summary report. Double-click Overview from <strong>the</strong> Reports<br />
dialog box, and <strong>the</strong>n double-click <strong>Project</strong> Summary in <strong>the</strong> Overview Reports<br />
dialog box. Notice that <strong>the</strong> insertion point now resembles a magnifying glass.<br />
Click inside <strong>the</strong> report to zoom in or zoom out. Click <strong>the</strong> Close button to close<br />
this report, and <strong>the</strong>n experiment with viewing o<strong>the</strong>r reports. You will use several<br />
reports and o<strong>the</strong>r views throughout this appendix.<br />
9. Close <strong>the</strong> Reports feature. Click Close to close <strong>the</strong> Reports dialog box and<br />
return to <strong>the</strong> Gantt Chart view.<br />
Copyright 2009 Cengage Learning. All Rights Reserved.<br />
May not be copied, scanned, or duplicated, in whole or in part.<br />
337<br />
Guide to Using Microsoft <strong>Project</strong> 2007