Blackmagic ATEM Manual - Concept Music Art
Blackmagic ATEM Manual - Concept Music Art
Blackmagic ATEM Manual - Concept Music Art
Create successful ePaper yourself
Turn your PDF publications into a flip-book with our unique Google optimized e-Paper software.
14<br />
Getting Started<br />
Settings You Need To Check!<br />
Now you have the software control working, you need to change some settings to use your <strong>ATEM</strong> switcher.<br />
The changes are made in the settings tab of the <strong>ATEM</strong> Software Control and the most critical settings are<br />
listed below:<br />
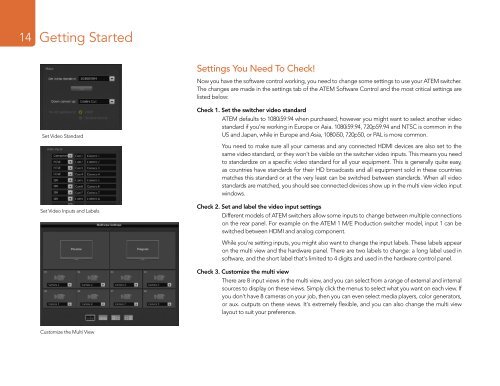
Set Video Standard<br />
Check 1. Set the switcher video standard<br />
<strong>ATEM</strong> defaults to 1080i59.94 when purchased, however you might want to select another video<br />
standard if you’re working in Europe or Asia. 1080i59.94, 720p59.94 and NTSC is common in the<br />
US and Japan, while in Europe and Asia, 1080i50, 720p50, or PAL is more common.<br />
You need to make sure all your cameras and any connected HDMI devices are also set to the<br />
same video standard, or they won't be visible on the switcher video inputs. This means you need<br />
to standardize on a specific video standard for all your equipment. This is generally quite easy,<br />
as countries have standards for their HD broadcasts and all equipment sold in these countries<br />
matches this standard or at the very least can be switched between standards. When all video<br />
standards are matched, you should see connected devices show up in the multi view video input<br />
windows.<br />
Set Video Inputs and Labels<br />
Check 2. Set and label the video input settings<br />
Different models of <strong>ATEM</strong> switchers allow some inputs to change between multiple connections<br />
on the rear panel. For example on the <strong>ATEM</strong> 1 M/E Production switcher model, input 1 can be<br />
switched between HDMI and analog component.<br />
While you’re setting inputs, you might also want to change the input labels. These labels appear<br />
on the multi view and the hardware panel. There are two labels to change: a long label used in<br />
software, and the short label that's limited to 4 digits and used in the hardware control panel.<br />
Check 3. Customize the multi view<br />
There are 8 input views in the multi view, and you can select from a range of external and internal<br />
sources to display on these views. Simply click the menus to select what you want on each view. If<br />
you don't have 8 cameras on your job, then you can even select media players, color generators,<br />
or aux. outputs on these views. It's extremely flexible, and you can also change the multi view<br />
layout to suit your preference.<br />
Customize the Multi View


