Getting Started with InfoSphere Data Architect

Create successful ePaper yourself
Turn your PDF publications into a flip-book with our unique Google optimized e-Paper software.
Chapter 6 – Generating Reports, Importing, and Exporting 111<br />
c. In the <strong>Data</strong> Project Explorer, right-click University Info System -> Other Files -><br />
BlankPhysicalModel.rptdesign and click Rename. The Rename Resource window opens.<br />
d. In the Rename Resource window, specify SDT_Info_Sys_custom for the new resource<br />
name and click OK.<br />
3. Open the Report Design perspective:<br />
a. From the main menu, click Window -> Open Perspective -> Other. The Open Perspective<br />
window opens.<br />
b. In the Open Perspective window, select Report Design. The perspective opens. The Palette,<br />
<strong>Data</strong> Explorer, Outline, and Property Editor views are empty until you open a report design in<br />
the Report Editor view. Not all of the views are visible. For example, the Navigator and<br />
Outline views are configured so that only one view is visible. Click the tab to display the other<br />
view.<br />
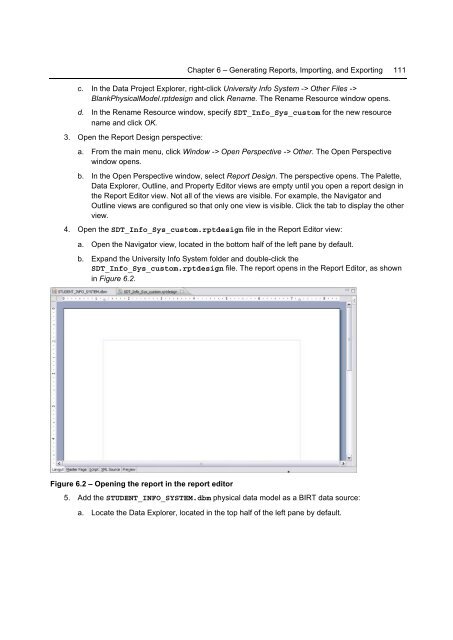
4. Open the SDT_Info_Sys_custom.rptdesign file in the Report Editor view:<br />
a. Open the Navigator view, located in the bottom half of the left pane by default.<br />
b. Expand the University Info System folder and double-click the<br />
SDT_Info_Sys_custom.rptdesign file. The report opens in the Report Editor, as shown<br />
in Figure 6.2.<br />
Figure 6.2 – Opening the report in the report editor<br />
5. Add the STUDENT_INFO_SYSTEM.dbm physical data model as a BIRT data source:<br />
a. Locate the <strong>Data</strong> Explorer, located in the top half of the left pane by default.