ISQ User Guide - Write Frame of Mind
ISQ User Guide - Write Frame of Mind
ISQ User Guide - Write Frame of Mind

Create successful ePaper yourself
Turn your PDF publications into a flip-book with our unique Google optimized e-Paper software.
1 Changing the Column<br />
Replacing the Factory-Installed Column<br />
c. Unwind about one turn <strong>of</strong> the column from the column outlet end.<br />
Note Wear clean, lint- and powder-free gloves when you handle the column and<br />
transfer line ferrule.<br />
d. Wipe approximately 300 mm (12 in.) <strong>of</strong> the column with a tissue soaked in<br />
methanol.<br />
e. Insert the column through the transfer line nut, and ferrule. Wipe the column again<br />
with a tissue soaked in methanol.<br />
f. Insert the column into the measuring tool, which is in the <strong>ISQ</strong> Toolkit, so at least 2<br />
cm extends past the tip.<br />
Tip Slide a septum on the column before adding the transfer line nut to make it easier<br />
to measure the proper distance between the nut and the end <strong>of</strong> the column. You can<br />
also use a white marker to mark the position <strong>of</strong> the column and nut.<br />
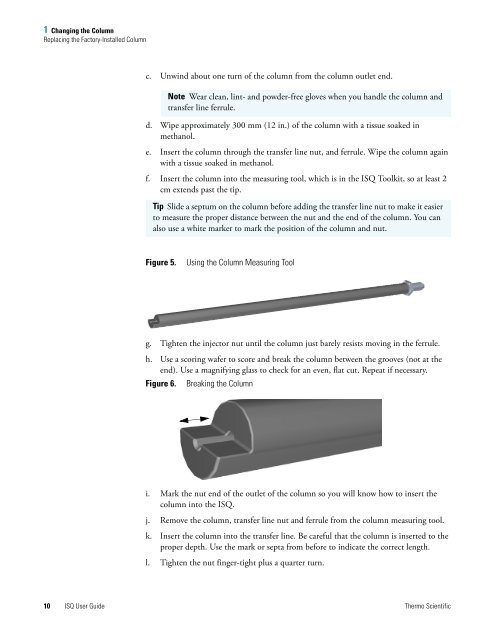
Figure 5. Using the Column Measuring Tool<br />
g. Tighten the injector nut until the column just barely resists moving in the ferrule.<br />
h. Use a scoring wafer to score and break the column between the grooves (not at the<br />
end). Use a magnifying glass to check for an even, flat cut. Repeat if necessary.<br />
Figure 6. Breaking the Column<br />
i. Mark the nut end <strong>of</strong> the outlet <strong>of</strong> the column so you will know how to insert the<br />
column into the <strong>ISQ</strong>.<br />
j. Remove the column, transfer line nut and ferrule from the column measuring tool.<br />
k. Insert the column into the transfer line. Be careful that the column is inserted to the<br />
proper depth. Use the mark or septa from before to indicate the correct length.<br />
l. Tighten the nut finger-tight plus a quarter turn.<br />
10 <strong>ISQ</strong> <strong>User</strong> <strong>Guide</strong> Thermo Scientific