PDF Converter Professional and Enterprise 8.0 Eval Guide - Nuance
PDF Converter Professional and Enterprise 8.0 Eval Guide - Nuance
PDF Converter Professional and Enterprise 8.0 Eval Guide - Nuance
You also want an ePaper? Increase the reach of your titles
YUMPU automatically turns print PDFs into web optimized ePapers that Google loves.
FAX VIA EMAIL<br />
Deliver <strong>PDF</strong> files directly to a fax machine by sending an email that uses predefined fax settings.<br />
A user can now deliver the file currently opened in <strong>PDF</strong> <strong>Converter</strong> <strong>Enterprise</strong> to a specified fax<br />
number via e- mail. The default format can be configured in <strong>PDF</strong> <strong>Converter</strong> <strong>Enterprise</strong> Preferences<br />
window, <strong>and</strong> the user can select different recipients to send the fax to each time they initiate the<br />
Fax via e-mail tool.<br />
Notes:<br />
A fax client <strong>and</strong>/or email client is required to use this feature. <strong>PDF</strong> <strong>Converter</strong> <strong>Enterprise</strong> simply<br />
passes the email message with <strong>PDF</strong> attachment to the fax or email client for delivery.<br />
Some fax machines may not accept emails containing file attachments. To confirm whether the<br />
fax machine supports this workflow, check with the fax machine’s manufacturer.<br />
To configure the Fax via e-mail settings:<br />
1. Click “Edit > Preferences”.<br />
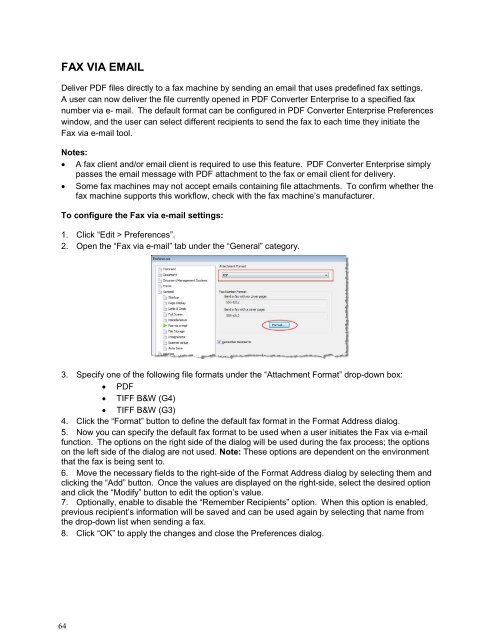
2. Open the “Fax via e-mail” tab under the “General” category.<br />
3. Specify one of the following file formats under the “Attachment Format” drop-down box:<br />
<strong>PDF</strong><br />
TIFF B&W (G4)<br />
TIFF B&W (G3)<br />
4. Click the “Format” button to define the default fax format in the Format Address dialog.<br />
5. Now you can specify the default fax format to be used when a user initiates the Fax via e-mail<br />
function. The options on the right side of the dialog will be used during the fax process; the options<br />
on the left side of the dialog are not used. Note: These options are dependent on the environment<br />
that the fax is being sent to.<br />
6. Move the necessary fields to the right-side of the Format Address dialog by selecting them <strong>and</strong><br />
clicking the “Add” button. Once the values are displayed on the right-side, select the desired option<br />
<strong>and</strong> click the “Modify” button to edit the option’s value.<br />
7. Optionally, enable to disable the “Remember Recipients” option. When this option is enabled,<br />
previous recipient’s information will be saved <strong>and</strong> can be used again by selecting that name from<br />
the drop-down list when sending a fax.<br />
8. Click “OK” to apply the changes <strong>and</strong> close the Preferences dialog.<br />
64


