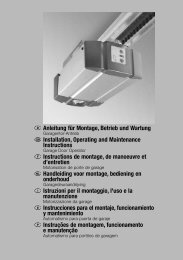
Template BA B168xH238 - Hormann.be
Template BA B168xH238 - Hormann.be
Template BA B168xH238 - Hormann.be

You also want an ePaper? Increase the reach of your titles
YUMPU automatically turns print PDFs into web optimized ePapers that Google loves.
ENGLISH<br />
7.3.5<br />
▶ See figure 11.7<br />
Connecting the emergency battery *<br />
An emergency battery can <strong>be</strong> connected to this terminal to<br />
temporarily supply the operator during a power failure.<br />
WARNING<br />
Danger of injury due to unexpected gate travel<br />
Unexpected gate travel can result when the emergency<br />
battery is still connected despite the mains plug <strong>be</strong>ing<br />
pulled out.<br />
▶ Pull out the mains plug and the plug of the emergency<br />
battery when performing all work on the gate system.<br />
7.4 Setting additional functions via the DIL<br />
switches<br />
The control is programmed via the DIL switches.<br />
Before initial start-up, the DIL switches are in factory settings,<br />
i.e. the switches are in the OFF position (see figure 5.1).<br />
Changes to the DIL switch settings are only permissible under<br />
the following conditions:<br />
• The operator is at rest.<br />
• The warning or hold-open phase is not active.<br />
• The LED GN does not flash.<br />
Set the DIL switches as descri<strong>be</strong>d <strong>be</strong>low in accordance with<br />
the national regulations, the desired safety equipment and the<br />
on-site conditions.<br />
The following DIL switches must <strong>be</strong> set:<br />
7.4.1 DIL switch 10/11: automatic timed closing/<br />
pre-warning time/option relay<br />
The functions of the operator (automatic timed closing/5 s<br />
pre-warning time) and the function of the option relay are set<br />
with DIL switch 10 in combination with DIL switch 11.<br />
NOTE:<br />
Automatic timed closing can only <strong>be</strong> activated if at least one<br />
safety device has <strong>be</strong>en activated.<br />
▶ See figure 12.1<br />
10 OFF 11 OFF Operator<br />
No special function<br />
Option relay<br />
Relay picks up in the CLOSE<br />
end-of-travel position<br />
▶ See figure 12.2<br />
10 ON 11 OFF Operator<br />
Warning phase for every gate<br />
travel without automatic timed<br />
closing<br />
Option relay<br />
Relay clocks rapidly during the<br />
pre-warning time and normally<br />
during the travel phase<br />
* Accessory, not included as standard equipment!<br />
▶ See figure 12.3<br />
10 OFF 11 ON Operator<br />
Automatic timed closing, prewarning<br />
time only for<br />
automatic timed closing<br />
Option relay<br />
Relay clocks rapidly during the<br />
pre-warning time, normally<br />
during the travel phase and is<br />
OFF during the hold-open<br />
phase.<br />
▶ See figure 12.4<br />
10 ON 11 ON Operator<br />
Automatic timed closing, prewarning<br />
time for each gate<br />
movement<br />
Option relay<br />
Relay clocks rapidly during the<br />
pre-warning time, normally<br />
during the travel phase and is<br />
OFF during the hold-open<br />
phase.<br />
Note:<br />
Automatic timed closing is only possible from the OPEN<br />
end‐of-travel position. If the force limit is tripped during<br />
closing, the gate briefly reverses in the OPEN direction and<br />
stops. If the photocell is tripped during closing, the gate<br />
reverses into the OPEN end-of-travel position and automatic<br />
timed closing is started again.<br />
7.4.2 Hold-open phase setting<br />
▶ See figure 12.5<br />
The OPEN hold-open phase until the gate automatically<br />
closes can <strong>be</strong> set in 5 stages.<br />
Setting the hold-open phase:<br />
1. Set DIL switch 12 to ON.<br />
12 ON Setting the hold-open phase<br />
12 OFF Without function<br />
2. Briefly press circuit board button P to decrease the<br />
hold‐open phase.<br />
or<br />
Briefly press circuit board button T to increase the holdopen<br />
phase.<br />
When setting the hold-open phase, the LED RT displays<br />
the following settings:<br />
LED RT<br />
1x flashing/<br />
break 30<br />
2x flashing/<br />
break<br />
3x flashing/<br />
break<br />
4x flashing/<br />
break<br />
5x flashing/<br />
break<br />
Hold-open phase in seconds<br />
60<br />
90<br />
120<br />
180<br />
40 TR10A078 RE / 07.2010