Emulator Composite.book - Creative
Emulator Composite.book - Creative
Emulator Composite.book - Creative

Create successful ePaper yourself
Turn your PDF publications into a flip-book with our unique Google optimized e-Paper software.
7 - Editing a Sample<br />
Looping and Loop Processing<br />
How to Loop a Sample<br />
Looping has gained a reputation for being something of a black art. In actuality, it's<br />
really not that difficult to loop most sounds, especially with all the looping tools<br />
provided by the <strong>Emulator</strong> X.<br />
The Attack portion of the sound is the beginning portion of the waveform. The attack is<br />
usually composed of changing harmonics and is difficult to loop. To get a smooth<br />
sounding loop, move the loop start and end points into a portion of the wave where<br />
the sample looks and sounds repetitive and is steady in amplitude. Changes in<br />
amplitude between the loop start and end points will be heard as sharp clicks or pops.<br />
You don’t want this.<br />
1. Select a sample from the Tree by double-clicking on the sample name or icon.<br />
The Sample Editor window appears. You can also select samples by double-clicking<br />
on the sample name in the Voice Processing window, or by selecting a sample and<br />
choosing “Open Sample”from the Preset menu.<br />
2. Press the Select Loop button to jump to any pre-existing loop.<br />
3. Magnify the waveform using the Zoom button if necessary. Look for a region of the<br />
sample near the end where the wave looks repetitive.<br />
Initial Settings<br />
4. Place the Loop End marker near or at the end of the sample by dragging it into<br />
position. Position it at a zero crossing by holding the Right Control key and<br />
pressing the left or right arrow keys. (See page 183 for more information.)<br />
5. Use the Autocorrelate Loop (Ctrl + K) feature in the Sample Loop menu to get you<br />
into the ballpark.<br />
Listen & Adjust the Start Point<br />
6. Make sure Loop Play in the transport toolbar is turned off and select Play. The<br />
sample will play and continue playing within the loop boundaries.<br />
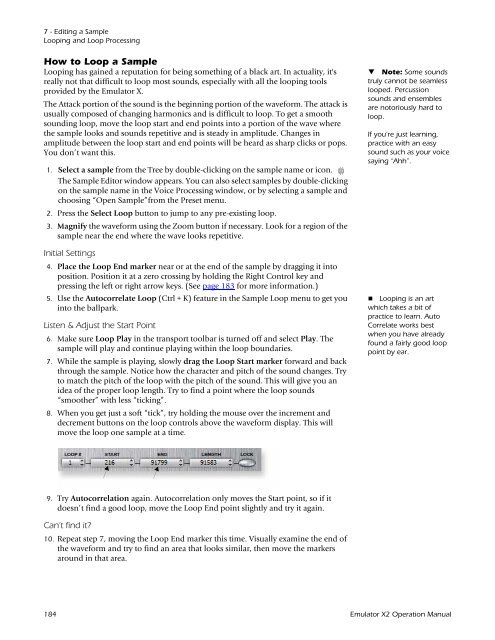
7. While the sample is playing, slowly drag the Loop Start marker forward and back<br />
through the sample. Notice how the character and pitch of the sound changes. Try<br />
to match the pitch of the loop with the pitch of the sound. This will give you an<br />
idea of the proper loop length. Try to find a point where the loop sounds<br />
“smoother” with less “ticking”.<br />
8. When you get just a soft “tick”, try holding the mouse over the increment and<br />
decrement buttons on the loop controls above the waveform display. This will<br />
move the loop one sample at a time.<br />
9. Try Autocorrelation again. Autocorrelation only moves the Start point, so if it<br />
doesn’t find a good loop, move the Loop End point slightly and try it again.<br />
Can’t find it?<br />
10. Repeat step 7, moving the Loop End marker this time. Visually examine the end of<br />
the waveform and try to find an area that looks similar, then move the markers<br />
around in that area.<br />
Note: Some sounds<br />
truly cannot be seamless<br />
looped. Percussion<br />
sounds and ensembles<br />
are notoriously hard to<br />
loop.<br />
If you’re just learning,<br />
practice with an easy<br />
sound such as your voice<br />
saying “Ahh”.<br />
Looping is an art<br />
which takes a bit of<br />
practice to learn. Auto<br />
Correlate works best<br />
when you have already<br />
found a fairly good loop<br />
point by ear.<br />
184 <strong>Emulator</strong> X2 Operation Manual