Emulator Composite.book - Creative
Emulator Composite.book - Creative
Emulator Composite.book - Creative

Create successful ePaper yourself
Turn your PDF publications into a flip-book with our unique Google optimized e-Paper software.
11 - From Sample to Preset<br />
SynthSwipe<br />
• If no inputs are listed, make sure E-MU ASIO is selected in the Preferences<br />
dialog, and that the current PatchMix DSP Session contains at least one ASIO<br />
Send.<br />
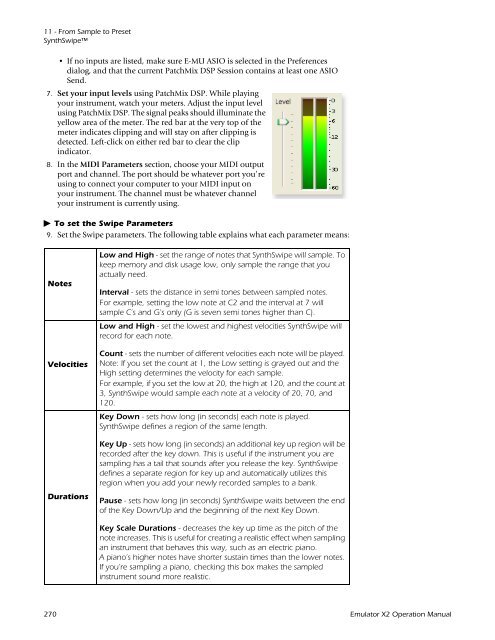
7. Set your input levels using PatchMix DSP. While playing<br />
your instrument, watch your meters. Adjust the input level<br />
using PatchMix DSP. The signal peaks should illuminate the<br />
yellow area of the meter. The red bar at the very top of the<br />
meter indicates clipping and will stay on after clipping is<br />
detected. Left-click on either red bar to clear the clip<br />
indicator.<br />
8. In the MIDI Parameters section, choose your MIDI output<br />
port and channel. The port should be whatever port you’re<br />
using to connect your computer to your MIDI input on<br />
your instrument. The channel must be whatever channel<br />
your instrument is currently using.<br />
To set the Swipe Parameters<br />
9. Set the Swipe parameters. The following table explains what each parameter means:<br />
Notes<br />
Velocities<br />
Durations<br />
Low and High - set the range of notes that SynthSwipe will sample. To<br />
keep memory and disk usage low, only sample the range that you<br />
actually need.<br />
Interval - sets the distance in semi tones between sampled notes.<br />
For example, setting the low note at C2 and the interval at 7 will<br />
sample C’s and G’s only (G is seven semi tones higher than C).<br />
Low and High - set the lowest and highest velocities SynthSwipe will<br />
record for each note.<br />
Count - sets the number of different velocities each note will be played.<br />
Note: If you set the count at 1, the Low setting is grayed out and the<br />
High setting determines the velocity for each sample.<br />
For example, if you set the low at 20, the high at 120, and the count at<br />
3, SynthSwipe would sample each note at a velocity of 20, 70, and<br />
120.<br />
Key Down - sets how long (in seconds) each note is played.<br />
SynthSwipe defines a region of the same length.<br />
Key Up - sets how long (in seconds) an additional key up region will be<br />
recorded after the key down. This is useful if the instrument you are<br />
sampling has a tail that sounds after you release the key. SynthSwipe<br />
defines a separate region for key up and automatically utilizes this<br />
region when you add your newly recorded samples to a bank.<br />
Pause - sets how long (in seconds) SynthSwipe waits between the end<br />
of the Key Down/Up and the beginning of the next Key Down.<br />
Key Scale Durations - decreases the key up time as the pitch of the<br />
note increases. This is useful for creating a realistic effect when sampling<br />
an instrument that behaves this way, such as an electric piano.<br />
A piano’s higher notes have shorter sustain times than the lower notes.<br />
If you’re sampling a piano, checking this box makes the sampled<br />
instrument sound more realistic.<br />
270 <strong>Emulator</strong> X2 Operation Manual