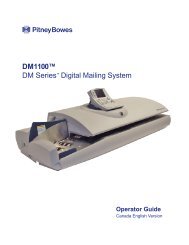
Digital Mailing System DM400,TM DM500TM and DM550TM
Digital Mailing System DM400,TM DM500TM and DM550TM
Digital Mailing System DM400,TM DM500TM and DM550TM
Create successful ePaper yourself
Turn your PDF publications into a flip-book with our unique Google optimized e-Paper software.
1<br />
2<br />
Viewing<br />
Accounts or<br />
Subaccounts<br />
Creating<br />
Accounts<br />
<strong>and</strong><br />
Subaccounts<br />
1. Press the Accounts key.<br />
<strong>DM400</strong>, DM500, DM550 Operating Guide<br />
2. Press the right arrow key to enter the “Set Up Accounts” screen.<br />
3. Select View Accounts.<br />
4. The names of your top level accounts appear. Select the account you<br />
want.<br />
5. The system displays the total funds <strong>and</strong> total pieces for that account<br />
which includes the rolled up totals for all its subaccounts <strong>and</strong> subsubaccounts.<br />
If the account has subaccounts, you can also select View<br />
Subaccount <strong>and</strong> View Subsubaccount to get the information for<br />
each.<br />
To create a new account:<br />
1. Press the Accounts key.<br />
2. Press the right arrow key to enter the “Set Up Account” screen.<br />
3. Select Create Account.<br />
4. Select Create a New Account. The system prompts you to enter an<br />
account name.<br />
5. Type in the name using the keyboard or numeric keypad <strong>and</strong> press<br />
Enter. The “Account Information” screen appears <strong>and</strong> displays the options:<br />
Edit Name<br />
Edit Number<br />
Add | Change Password<br />
Add Subaccount (to account) | Subsubaccount (to subaccount)<br />
Create Another Account | Subaccount | Subsubaccount<br />
6. Select the appropriate option <strong>and</strong> follow the prompts.<br />
Notes:<br />
a. By default, the system assigns the next available account number to<br />
your new account. If you want to assign a different number, select the<br />
Change Number option.<br />
b. If you want to password protect this account, select the Add Password<br />
option. You will be prompted to enter a password <strong>and</strong> then confirm it.<br />
Passwords are case sensitive, can be alphanumeric <strong>and</strong> must be at<br />
least four characters. (You need to enable password protection before<br />
you can protect an individual account. Refer to 7 Turning Accounting<br />
Password Protection On or Off in this chapter.<br />
7. When you are done, press the Enter key to save the account information.<br />
SV61964 Rev. A 7-7


