

Humminbird - Fish Finders and GPS
Humminbird - Fish Finders and GPS
Humminbird - Fish Finders and GPS

You also want an ePaper? Increase the reach of your titles
YUMPU automatically turns print PDFs into web optimized ePapers that Google loves.
Accessories Menu Tab<br />
From any view, press the MENU key twice to access the tabbed Main Menu<br />
System, then press the RIGHT cursor key until the Accessories tab is selected.<br />
If no accessories are attached to the Accessory Bus, no accessory menu<br />
choices will appear under the Accessories tab, only the Screen Snapshot<br />
menu choice. If an accessory is attached, however, additional menu choices<br />
that support the accessory will be added automatically. See the Operations<br />
Manual that comes with your accessory for detailed information.<br />
Accessories Menu<br />
(no accessories attached)<br />
Accessories Menu<br />
(with accessories attached)<br />
NOTE: Accessories to enable WeatherSense® <strong>and</strong> the SmartCast® Wireless Sonar Link<br />
(WSL) require separate purchases. You can visit our website at www.humminbird.com<br />
or contact our Customer Resource Center at 1-800-633-1468 for additional details.<br />
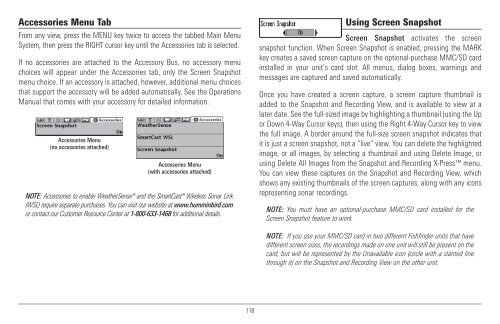
Using Screen Snapshot<br />
Screen Snapshot activates the screen<br />
snapshot function. When Screen Snapshot is enabled, pressing the MARK<br />
key creates a saved screen capture on the optional-purchase MMC/SD card<br />
installed in your unit’s card slot. All menus, dialog boxes, warnings <strong>and</strong><br />
messages are captured <strong>and</strong> saved automatically.<br />
Once you have created a screen capture, a screen capture thumbnail is<br />
added to the Snapshot <strong>and</strong> Recording View, <strong>and</strong> is available to view at a<br />
later date. See the full-sized image by highlighting a thumbnail (using the Up<br />
or Down 4-Way Cursor keys), then using the Right 4-Way Cursor key to view<br />
the full image. A border around the full-size screen snapshot indicates that<br />
it is just a screen snapshot, not a “live” view. You can delete the highlighted<br />
image, or all images, by selecting a thumbnail <strong>and</strong> using Delete Image, or<br />
using Delete All Images from the Snapshot <strong>and</strong> Recording X-Press menu.<br />
You can view these captures on the Snapshot <strong>and</strong> Recording View, which<br />
shows any existing thumbnails of the screen captures, along with any icons<br />
representing sonar recordings.<br />
NOTE: You must have an optional-purchase MMC/SD card installed for the<br />
Screen Snapshot feature to work.<br />
NOTE: If you use your MMC/SD card in two different <strong>Fish</strong>finder units that have<br />
different screen sizes, the recordings made on one unit will still be present on the<br />
card, but will be represented by the Unavailable icon (circle with a slanted line<br />
through it) on the Snapshot <strong>and</strong> Recording View on the other unit.<br />
118


