

Humminbird - Fish Finders and GPS
Humminbird - Fish Finders and GPS
Humminbird - Fish Finders and GPS

You also want an ePaper? Increase the reach of your titles
YUMPU automatically turns print PDFs into web optimized ePapers that Google loves.
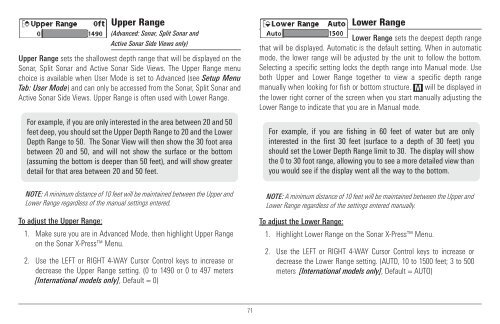
Upper Range<br />
(Advanced: Sonar, Split Sonar <strong>and</strong><br />
Active Sonar Side Views only)<br />
Upper Range sets the shallowest depth range that will be displayed on the<br />
Sonar, Split Sonar <strong>and</strong> Active Sonar Side Views. The Upper Range menu<br />
choice is available when User Mode is set to Advanced (see Setup Menu<br />
Tab: User Mode) <strong>and</strong> can only be accessed from the Sonar, Split Sonar <strong>and</strong><br />
Active Sonar Side Views. Upper Range is often used with Lower Range.<br />
For example, if you are only interested in the area between 20 <strong>and</strong> 50<br />
feet deep, you should set the Upper Depth Range to 20 <strong>and</strong> the Lower<br />
Depth Range to 50. The Sonar View will then show the 30 foot area<br />
between 20 <strong>and</strong> 50, <strong>and</strong> will not show the surface or the bottom<br />
(assuming the bottom is deeper than 50 feet), <strong>and</strong> will show greater<br />
detail for that area between 20 <strong>and</strong> 50 feet.<br />
Lower Range<br />
Lower Range sets the deepest depth range<br />
that will be displayed. Automatic is the default setting. When in automatic<br />
mode, the lower range will be adjusted by the unit to follow the bottom.<br />
Selecting a specific setting locks the depth range into Manual mode. Use<br />
both Upper <strong>and</strong> Lower Range together to view a specific depth range<br />
manually when looking for fish or bottom structure. M will be displayed in<br />
the lower right corner of the screen when you start manually adjusting the<br />
Lower Range to indicate that you are in Manual mode.<br />
For example, if you are fishing in 60 feet of water but are only<br />
interested in the first 30 feet (surface to a depth of 30 feet) you<br />
should set the Lower Depth Range limit to 30. The display will show<br />
the 0 to 30 foot range, allowing you to see a more detailed view than<br />
you would see if the display went all the way to the bottom.<br />
NOTE: A minimum distance of 10 feet will be maintained between the Upper <strong>and</strong><br />
Lower Range regardless of the manual settings entered.<br />
To adjust the Upper Range:<br />
1. Make sure you are in Advanced Mode, then highlight Upper Range<br />
on the Sonar X-Press Menu.<br />
2. Use the LEFT or RIGHT 4-WAY Cursor Control keys to increase or<br />
decrease the Upper Range setting. (0 to 1490 or 0 to 497 meters<br />
[International models only], Default = 0)<br />
NOTE: A minimum distance of 10 feet will be maintained between the Upper <strong>and</strong><br />
Lower Range regardless of the settings entered manually.<br />
To adjust the Lower Range:<br />
1. Highlight Lower Range on the Sonar X-Press Menu.<br />
2. Use the LEFT or RIGHT 4-WAY Cursor Control keys to increase or<br />
decrease the Lower Range setting. (AUTO, 10 to 1500 feet; 3 to 500<br />
meters [International models only], Default = AUTO)<br />
71


