

Chapter 1. Color Management Background - Kodak
Chapter 1. Color Management Background - Kodak
Chapter 1. Color Management Background - Kodak

Create successful ePaper yourself
Turn your PDF publications into a flip-book with our unique Google optimized e-Paper software.
<strong>Chapter</strong> 2. Using <strong>Color</strong>Wise Pro Tools<br />
Profile Manager<br />
2. If the desired profile does not appear, click Browse to go to a different<br />
directory. Browse to the directory containing the profile you want to<br />
download and click OK.<br />
3. When the profile you want to download appears in the list in the main<br />
Profile Manager window, select it. If the profile is compatible with the<br />
Fiery, a green arrow indicates that the profile is available for<br />
downloading. Output device profiles are only downloadable to<br />
Simulation and Output. Input device profiles are only downloadable to<br />
RGB Source.<br />
Note: On Windows computers, the profiles must have an extension of .icc or<br />
.icm to be listed.<br />
All ICC profiles in the selected directory on your computer are<br />
displayed in the list in the main Profile Manager window. However,<br />
because a profile is listed does not necessarily mean it can be<br />
downloaded to the Fiery.<br />
Simulation profiles should be profiles only for those devices you want<br />
the Fiery to match in terms of color output characteristics. Output<br />
profiles should be profiles only for the press. Although you can<br />
download CMYK printer profiles as Simulation or Output, consider<br />
how they will be used. If you want the Fiery prints to look like another<br />
printer, download that profile as a Simulation. If you have a custom<br />
profile of the press you print to, download that profile as an Output<br />
profile.<br />
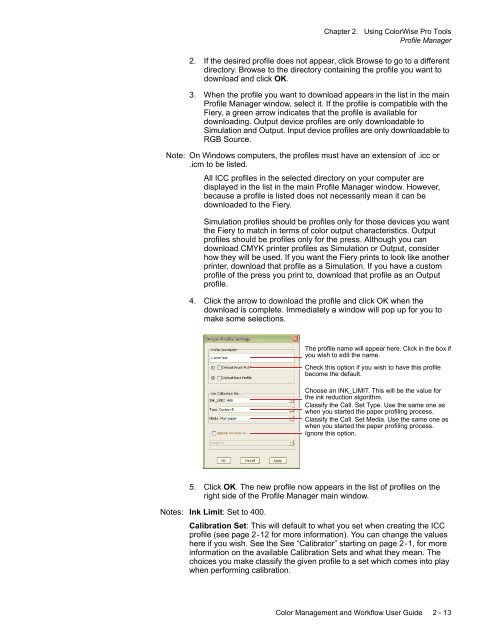
4. Click the arrow to download the profile and click OK when the<br />
download is complete. Immediately a window will pop up for you to<br />
make some selections.<br />
The profile name will appear here. Click in the box if<br />
you wish to edit the name.<br />
Check this option if you wish to have this profile<br />
become the default.<br />
Choose an INK_LIMIT. This will be the value for<br />
the ink reduction algorithm.<br />
Classify the Call. Set Type. Use the same one as<br />
when you started the paper profiling process.<br />
Classify the Call. Set Media. Use the same one as<br />
when you started the paper profiling process.<br />
Ignore this option.<br />
5. Click OK. The new profile now appears in the list of profiles on the<br />
right side of the Profile Manager main window.<br />
Notes: Ink Limit: Set to 400.<br />
Calibration Set: This will default to what you set when creating the ICC<br />
profile (see page 2-12 for more information). You can change the values<br />
here if you wish. See the See “Calibrator” starting on page 2-1, for more<br />
information on the available Calibration Sets and what they mean. The<br />
choices you make classify the given profile to a set which comes into play<br />
when performing calibration.<br />
<strong>Color</strong> <strong>Management</strong> and Workflow User Guide 2 - 13


