

Chapter 1. Color Management Background - Kodak
Chapter 1. Color Management Background - Kodak
Chapter 1. Color Management Background - Kodak

You also want an ePaper? Increase the reach of your titles
YUMPU automatically turns print PDFs into web optimized ePapers that Google loves.
<strong>Chapter</strong> 4. Software Procedures<br />
DFE Software Installation<br />
10. Enter the correct IP address for Connection 1 (see Table 4.4), or let<br />
Windows obtain an IP address automatically.<br />
Table 4.4<br />
Network addresses, QX9000 blades<br />
Blade<br />
PRO/1000 MT Adapter #2<br />
(Connection 1 Address)<br />
PRO/1000 MT Adapter<br />
(Connection 2 Address)<br />
PRO/100 S Adapter<br />
(Connection 3 Address)<br />
Subnet Mask<br />
Control 0 192.168.10.1 Installation specific 192.168.200.250 255.255.255.0<br />
RIP 1 192.168.10.2 Obtain automatically 192.168.200.21 255.255.255.0<br />
RIP 2 192.168.10.3 Obtain automatically Obtain automatically 255.255.255.0<br />
RIP 3 192.168.10.4 Obtain automatically Obtain automatically 255.255.255.0<br />
RIP 4 192.168.10.5 Obtain automatically Obtain automatically 255.255.255.0<br />
RIP 5 192.168.10.6 Obtain automatically Obtain automatically 255.255.255.0<br />
RIP 6 192.168.10.7 Obtain automatically Obtain automatically 255.255.255.0<br />
RIP 7 192.168.10.8 Obtain automatically Obtain automatically 255.255.255.0<br />
RIP 8 192.168.10.9 Obtain automatically Obtain automatically 255.255.255.0<br />
1<strong>1.</strong> Click on the Subnet mask field to have the correct value automatically<br />
entered, then click OK.<br />
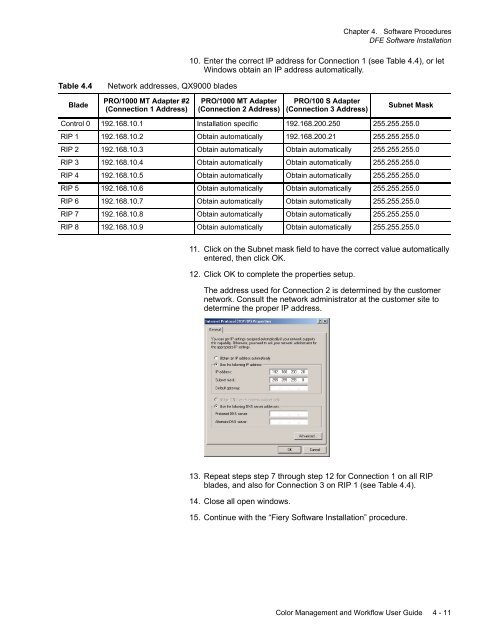
12. Click OK to complete the properties setup.<br />
The address used for Connection 2 is determined by the customer<br />
network. Consult the network administrator at the customer site to<br />
determine the proper IP address.<br />
13. Repeat steps step 7 through step 12 for Connection 1 on all RIP<br />
blades, and also for Connection 3 on RIP 1 (see Table 4.4).<br />
14. Close all open windows.<br />
15. Continue with the “Fiery Software Installation” procedure.<br />
<strong>Color</strong> <strong>Management</strong> and Workflow User Guide 4 - 11


