

Chapter 1. Color Management Background - Kodak
Chapter 1. Color Management Background - Kodak
Chapter 1. Color Management Background - Kodak

Create successful ePaper yourself
Turn your PDF publications into a flip-book with our unique Google optimized e-Paper software.
<strong>Chapter</strong> 2. Using <strong>Color</strong>Wise Pro Tools<br />
Workflow - CMYK <strong>Color</strong> Patches / Test Patterns<br />
Workflow - CMYK <strong>Color</strong> Patches / Test Patterns<br />
If you have CMYK color patch or test pattern data that has already been<br />
corrected for your <strong>Kodak</strong> Versamark <strong>Color</strong> Press and you wish to print it<br />
using the CS600 so that the data is not changed, follow this workflow.<br />
This type of color setup is achievable in two ways: globally or as a Job<br />
Override.<br />
Note: It is much easier to use the Job Override method.<br />
Globally<br />
<strong>1.</strong> Launch the <strong>Color</strong>Wise Pro Tools toolbar.<br />
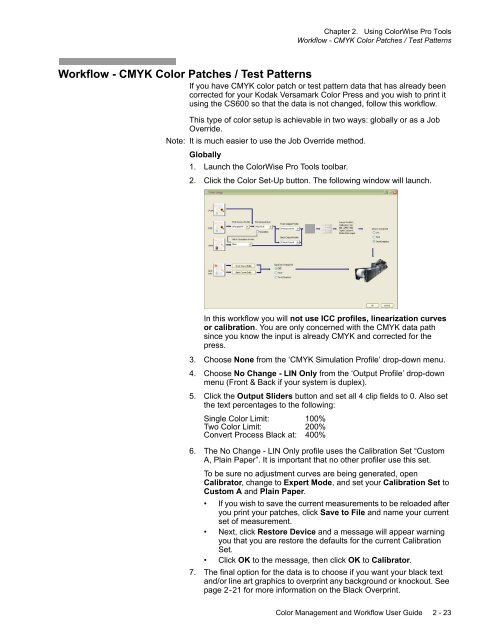
2. Click the <strong>Color</strong> Set-Up button. The following window will launch.<br />
In this workflow you will not use ICC profiles, linearization curves<br />
or calibration. You are only concerned with the CMYK data path<br />
since you know the input is already CMYK and corrected for the<br />
press.<br />
3. Choose None from the ‘CMYK Simulation Profile’ drop-down menu.<br />
4. Choose No Change - LIN Only from the ‘Output Profile’ drop-down<br />
menu (Front & Back if your system is duplex).<br />
5. Click the Output Sliders button and set all 4 clip fields to 0. Also set<br />
the text percentages to the following:<br />
Single <strong>Color</strong> Limit: 100%<br />
Two <strong>Color</strong> Limit: 200%<br />
Convert Process Black at: 400%<br />
6. The No Change - LIN Only profile uses the Calibration Set “Custom<br />
A, Plain Paper”. It is important that no other profiler use this set.<br />
To be sure no adjustment curves are being generated, open<br />
Calibrator, change to Expert Mode, and set your Calibration Set to<br />
Custom A and Plain Paper.<br />
• If you wish to save the current measurements to be reloaded after<br />
you print your patches, click Save to File and name your current<br />
set of measurement.<br />
• Next, click Restore Device and a message will appear warning<br />
you that you are restore the defaults for the current Calibration<br />
Set.<br />
• Click OK to the message, then click OK to Calibrator.<br />
7. The final option for the data is to choose if you want your black text<br />
and/or line art graphics to overprint any background or knockout. See<br />
page 2-21 for more information on the Black Overprint.<br />
<strong>Color</strong> <strong>Management</strong> and Workflow User Guide 2 - 23


