

Chapter 1. Color Management Background - Kodak
Chapter 1. Color Management Background - Kodak
Chapter 1. Color Management Background - Kodak

Create successful ePaper yourself
Turn your PDF publications into a flip-book with our unique Google optimized e-Paper software.
<strong>Chapter</strong> 2. Using <strong>Color</strong>Wise Pro Tools<br />
Output Profile Creation<br />
Linearization Tables<br />
Density Data<br />
Destination Profile<br />
the *.ct0 file corresponding to the chosen<br />
linearization percentage you saved from the<br />
<strong>Color</strong> Toolkit in step <strong>1.</strong>I.7.<br />
the *_golden.cm0 files you saved from the<br />
<strong>Color</strong>Wise Pro Tools Calibrator in step <strong>1.</strong>H.9.<br />
the *.icm file you saved from Monaco Profiler, or<br />
your own ICC creation software.<br />
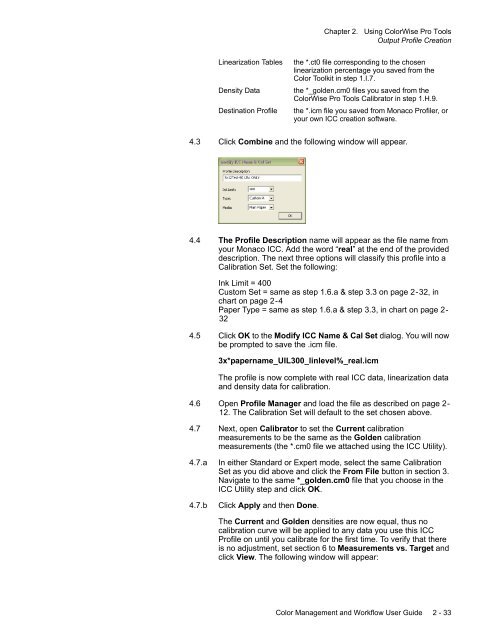
4.3 Click Combine and the following window will appear.<br />
4.4 The Profile Description name will appear as the file name from<br />
your Monaco ICC. Add the word “real” at the end of the provided<br />
description. The next three options will classify this profile into a<br />
Calibration Set. Set the following:<br />
Ink Limit = 400<br />
Custom Set = same as step <strong>1.</strong>6.a & step 3.3 on page 2-32, in<br />
chart on page 2-4<br />
Paper Type = same as step <strong>1.</strong>6.a & step 3.3, in chart on page 2-<br />
32<br />
4.5 Click OK to the Modify ICC Name & Cal Set dialog. You will now<br />
be prompted to save the .icm file.<br />
3x*papername_UIL300_linlevel%_real.icm<br />
The profile is now complete with real ICC data, linearization data<br />
and density data for calibration.<br />
4.6 Open Profile Manager and load the file as described on page 2-<br />
12. The Calibration Set will default to the set chosen above.<br />
4.7 Next, open Calibrator to set the Current calibration<br />
measurements to be the same as the Golden calibration<br />
measurements (the *.cm0 file we attached using the ICC Utility).<br />
4.7.a<br />
4.7.b<br />
In either Standard or Expert mode, select the same Calibration<br />
Set as you did above and click the From File button in section 3.<br />
Navigate to the same *_golden.cm0 file that you choose in the<br />
ICC Utility step and click OK.<br />
Click Apply and then Done.<br />
The Current and Golden densities are now equal, thus no<br />
calibration curve will be applied to any data you use this ICC<br />
Profile on until you calibrate for the first time. To verify that there<br />
is no adjustment, set section 6 to Measurements vs. Target and<br />
click View. The following window will appear:<br />
<strong>Color</strong> <strong>Management</strong> and Workflow User Guide 2 - 33


