

STX Signal Transmitter Installation and Operation ... - Kistler-Morse
STX Signal Transmitter Installation and Operation ... - Kistler-Morse
STX Signal Transmitter Installation and Operation ... - Kistler-Morse

You also want an ePaper? Increase the reach of your titles
YUMPU automatically turns print PDFs into web optimized ePapers that Google loves.
Chapter 5. MVS-<strong>STX</strong> Display Menu<br />
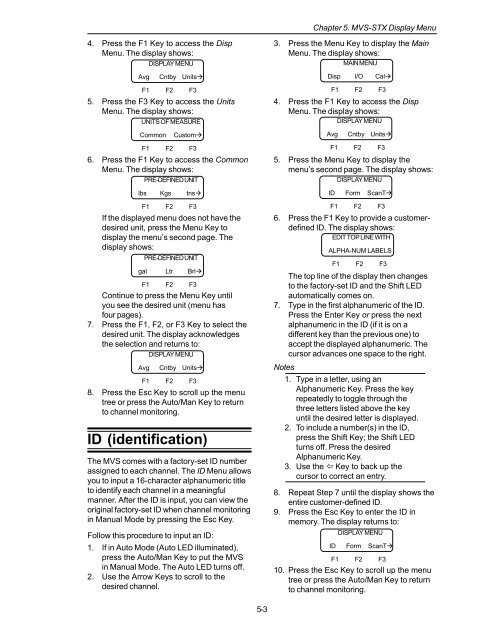
4. Press the F1 Key to access the Disp<br />
Menu. The display shows:<br />
DISPLAY MENU<br />
Avg<br />
Cntby Units<br />
F1 F2 F3<br />
5. Press the F3 Key to access the Units<br />
Menu. The display shows:<br />
UNITS OF MEASURE<br />
Common<br />
Custom<br />
F1 F2 F3<br />
6. Press the F1 Key to access the Common<br />
Menu. The display shows:<br />
PRE-DEFINED UNIT<br />
lbs Kgs tns<br />
F1 F2 F3<br />
If the displayed menu does not have the<br />
desired unit, press the Menu Key to<br />
display the menu’s second page. The<br />
display shows:<br />
PRE-DEFINED UNIT<br />
gal Ltr Brl<br />
F1 F2 F3<br />
Continue to press the Menu Key until<br />
you see the desired unit (menu has<br />
four pages).<br />
7. Press the F1, F2, or F3 Key to select the<br />
desired unit. The display acknowledges<br />
the selection <strong>and</strong> returns to:<br />
DISPLAY MENU<br />
Avg<br />
Cntby Units<br />
F1 F2 F3<br />
8. Press the Esc Key to scroll up the menu<br />
tree or press the Auto/Man Key to return<br />
to channel monitoring.<br />
ID (identification)<br />
The MVS comes with a factory-set ID number<br />
assigned to each channel. The ID Menu allows<br />
you to input a 16-character alphanumeric title<br />
to identify each channel in a meaningful<br />
manner. After the ID is input, you can view the<br />
original factory-set ID when channel monitoring<br />
in Manual Mode by pressing the Esc Key.<br />
Follow this procedure to input an ID:<br />
1. If in Auto Mode (Auto LED illuminated),<br />
press the Auto/Man Key to put the MVS<br />
in Manual Mode. The Auto LED turns off.<br />
2. Use the Arrow Keys to scroll to the<br />
desired channel.<br />
3. Press the Menu Key to display the Main<br />
Menu. The display shows:<br />
MAIN MENU<br />
Disp I/O Cal<br />
F1 F2 F3<br />
4. Press the F1 Key to access the Disp<br />
Menu. The display shows:<br />
DISPLAY MENU<br />
Avg<br />
Cntby Units<br />
F1 F2 F3<br />
5. Press the Menu Key to display the<br />
menu’s second page. The display shows:<br />
DISPLAY MENU<br />
ID Form ScanT<br />
F1 F2 F3<br />
6. Press the F1 Key to provide a customerdefined<br />
ID. The display shows:<br />
EDIT TOP LINE WITH<br />
ALPHA-NUM LABELS<br />
F1 F2 F3<br />
The top line of the display then changes<br />
to the factory-set ID <strong>and</strong> the Shift LED<br />
automatically comes on.<br />
7. Type in the first alphanumeric of the ID.<br />
Press the Enter Key or press the next<br />
alphanumeric in the ID (if it is on a<br />
different key than the previous one) to<br />
accept the displayed alphanumeric. The<br />
cursor advances one space to the right.<br />
Notes<br />
1. Type in a letter, using an<br />
Alphanumeric Key. Press the key<br />
repeatedly to toggle through the<br />
three letters listed above the key<br />
until the desired letter is displayed.<br />
2. To include a number(s) in the ID,<br />
press the Shift Key; the Shift LED<br />
turns off. Press the desired<br />
Alphanumeric Key.<br />
3. Use the Key to back up the<br />
cursor to correct an entry.<br />
8. Repeat Step 7 until the display shows the<br />
entire customer-defined ID.<br />
9. Press the Esc Key to enter the ID in<br />
memory. The display returns to:<br />
DISPLAY MENU<br />
ID Form ScanT<br />
F1 F2 F3<br />
10. Press the Esc Key to scroll up the menu<br />
tree or press the Auto/Man Key to return<br />
to channel monitoring.<br />
5-3


