STX Signal Transmitter Installation and Operation ... - Kistler-Morse
STX Signal Transmitter Installation and Operation ... - Kistler-Morse
STX Signal Transmitter Installation and Operation ... - Kistler-Morse
Create successful ePaper yourself
Turn your PDF publications into a flip-book with our unique Google optimized e-Paper software.
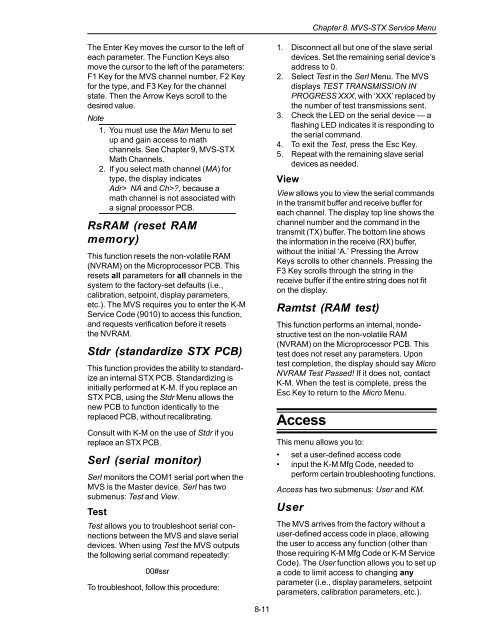
Chapter 8. MVS-<strong>STX</strong> Service Menu<br />
The Enter Key moves the cursor to the left of<br />
each parameter. The Function Keys also<br />
move the cursor to the left of the parameters:<br />
F1 Key for the MVS channel number, F2 Key<br />
for the type, <strong>and</strong> F3 Key for the channel<br />
state. Then the Arrow Keys scroll to the<br />
desired value.<br />
Note<br />
1. You must use the Man Menu to set<br />
up <strong>and</strong> gain access to math<br />
channels. See Chapter 9, MVS-<strong>STX</strong><br />
Math Channels.<br />
2. If you select math channel (MA) for<br />
type, the display indicates<br />
Adr> NA <strong>and</strong> Ch>?, because a<br />
math channel is not associated with<br />
a signal processor PCB.<br />
RsRAM (reset RAM<br />
memory)<br />
This function resets the non-volatile RAM<br />
(NVRAM) on the Microprocessor PCB. This<br />
resets all parameters for all channels in the<br />
system to the factory-set defaults (i.e.,<br />
calibration, setpoint, display parameters,<br />
etc.). The MVS requires you to enter the K-M<br />
Service Code (9010) to access this function,<br />
<strong>and</strong> requests verification before it resets<br />
the NVRAM.<br />
Stdr (st<strong>and</strong>ardize <strong>STX</strong> PCB)<br />
This function provides the ability to st<strong>and</strong>ardize<br />
an internal <strong>STX</strong> PCB. St<strong>and</strong>ardizing is<br />
initially performed at K-M. If you replace an<br />
<strong>STX</strong> PCB, using the Stdr Menu allows the<br />
new PCB to function identically to the<br />
replaced PCB, without recalibrating.<br />
Consult with K-M on the use of Stdr if you<br />
replace an <strong>STX</strong> PCB.<br />
Serl (serial monitor)<br />
Serl monitors the COM1 serial port when the<br />
MVS is the Master device. Serl has two<br />
submenus: Test <strong>and</strong> View.<br />
Test<br />
Test allows you to troubleshoot serial connections<br />
between the MVS <strong>and</strong> slave serial<br />
devices. When using Test the MVS outputs<br />
the following serial comm<strong>and</strong> repeatedly:<br />
00#ssr<br />
To troubleshoot, follow this procedure:<br />
1. Disconnect all but one of the slave serial<br />
devices. Set the remaining serial device’s<br />
address to 0.<br />
2. Select Test in the Serl Menu. The MVS<br />
displays TEST TRANSMISSION IN<br />
PROGRESS XXX, with ‘XXX’ replaced by<br />
the number of test transmissions sent.<br />
3. Check the LED on the serial device — a<br />
flashing LED indicates it is responding to<br />
the serial comm<strong>and</strong>.<br />
4. To exit the Test, press the Esc Key.<br />
5. Repeat with the remaining slave serial<br />
devices as needed.<br />
View<br />
View allows you to view the serial comm<strong>and</strong>s<br />
in the transmit buffer <strong>and</strong> receive buffer for<br />
each channel. The display top line shows the<br />
channel number <strong>and</strong> the comm<strong>and</strong> in the<br />
transmit (TX) buffer. The bottom line shows<br />
the information in the receive (RX) buffer,<br />
without the initial ‘A.’ Pressing the Arrow<br />
Keys scrolls to other channels. Pressing the<br />
F3 Key scrolls through the string in the<br />
receive buffer if the entire string does not fit<br />
on the display.<br />
Ramtst (RAM test)<br />
This function performs an internal, nondestructive<br />
test on the non-volatile RAM<br />
(NVRAM) on the Microprocessor PCB. This<br />
test does not reset any parameters. Upon<br />
test completion, the display should say Micro<br />
NVRAM Test Passed! If it does not, contact<br />
K-M. When the test is complete, press the<br />
Esc Key to return to the Micro Menu.<br />
Access<br />
This menu allows you to:<br />
• set a user-defined access code<br />
• input the K-M Mfg Code, needed to<br />
perform certain troubleshooting functions.<br />
Access has two submenus: User <strong>and</strong> KM.<br />
User<br />
The MVS arrives from the factory without a<br />
user-defined access code in place, allowing<br />
the user to access any function (other than<br />
those requiring K-M Mfg Code or K-M Service<br />
Code). The User function allows you to set up<br />
a code to limit access to changing any<br />
parameter (i.e., display parameters, setpoint<br />
parameters, calibration parameters, etc.).<br />
8-11


