You also want an ePaper? Increase the reach of your titles
YUMPU automatically turns print PDFs into web optimized ePapers that Google loves.
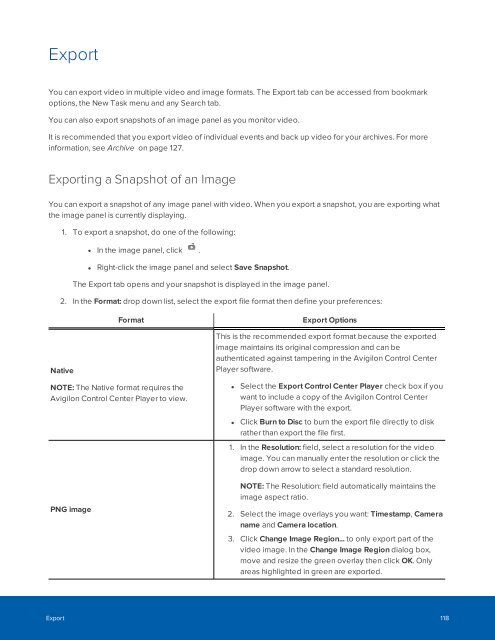
Export<br />
You can export video in multiple video and image formats. The Export tab can be accessed from bookmark<br />
options, the New Task menu and any Search tab.<br />
You can also export snapshots of an image panel as you monitor video.<br />
It is recommended that you export video of individual events and back up video for your archives. For more<br />
information, see Archive on page 127.<br />
Exporting a Snapshot of an Image<br />
You can export a snapshot of any image panel with video. When you export a snapshot, you are exporting what<br />
the image panel is currently displaying.<br />
1. To export a snapshot, do one of the following:<br />
• In the image panel, click .<br />
• Right-click the image panel and select Save Snapshot.<br />
The Export tab opens and your snapshot is displayed in the image panel.<br />
2. In the Format: drop down list, select the export file format then define your preferences:<br />
Native<br />
Format<br />
NOTE: The Native format requires the<br />
Avigilon Control Center Player to view.<br />
PNG image<br />
Export Options<br />
This is the recommended export format because the exported<br />
image maintains its original compression and can be<br />
authenticated against tampering in the Avigilon Control Center<br />
Player software.<br />
• Select the Export Control Center Player check box if you<br />
want to include a copy of the Avigilon Control Center<br />
Player software with the export.<br />
• Click Burn to Disc to burn the export file directly to disk<br />
rather than export the file first.<br />
1. In the Resolution: field, select a resolution for the video<br />
image. You can manually enter the resolution or click the<br />
drop down arrow to select a standard resolution.<br />
NOTE: The Resolution: field automatically maintains the<br />
image aspect ratio.<br />
2. Select the image overlays you want: Timestamp, Camera<br />
name and Camera location.<br />
3. Click Change Image Region... to only export part of the<br />
video image. In the Change Image Region dialog box,<br />
move and resize the green overlay then click OK. Only<br />
areas highlighted in green are exported.<br />
Export 118


