You also want an ePaper? Increase the reach of your titles
YUMPU automatically turns print PDFs into web optimized ePapers that Google loves.
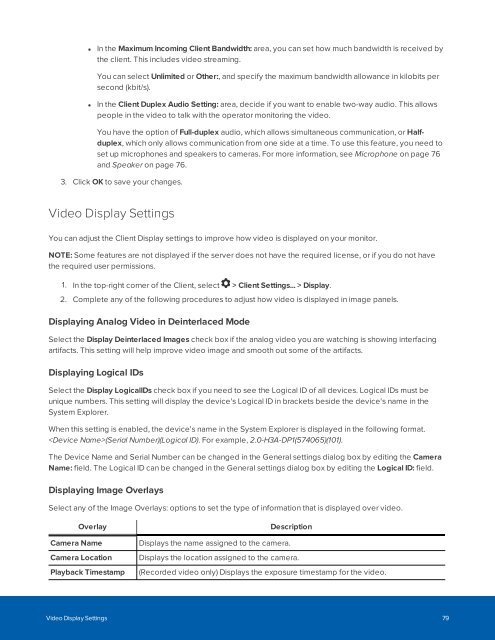
• In the Maximum Incoming Client Bandwidth: area, you can set how much bandwidth is received by<br />
the client. This includes video streaming.<br />
You can select Unlimited or Other:, and specify the maximum bandwidth allowance in kilobits per<br />
second (kbit/s).<br />
• In the Client Duplex Audio Setting: area, decide if you want to enable two-way audio. This allows<br />
people in the video to talk with the operator monitoring the video.<br />
You have the option of Full-duplex audio, which allows simultaneous communication, or Halfduplex,<br />
which only allows communication from one side at a time. To use this feature, you need to<br />
set up microphones and speakers to cameras. For more information, see Microphone on page 76<br />
and Speaker on page 76.<br />
3. Click OK to save your changes.<br />
Video Display Settings<br />
You can adjust the Client Display settings to improve how video is displayed on your monitor.<br />
NOTE: Some features are not displayed if the server does not have the required license, or if you do not have<br />
the required user permissions.<br />
1. In the top-right corner of the Client, select > Client Settings... > Display.<br />
2. Complete any of the following procedures to adjust how video is displayed in image panels.<br />
Displaying Analog Video in Deinterlaced Mode<br />
Select the Display Deinterlaced Images check box if the analog video you are watching is showing interfacing<br />
artifacts. This setting will help improve video image and smooth out some of the artifacts.<br />
Displaying Logical IDs<br />
Select the Display LogicalIDs check box if you need to see the Logical ID of all devices. Logical IDs must be<br />
unique numbers. This setting will display the device's Logical ID in brackets beside the device's name in the<br />
System Explorer.<br />
When this setting is enabled, the device's name in the System Explorer is displayed in the following format.<br />
(Serial Number)(Logical ID). For example, 2.0-H3A-DP1(574065)(101).<br />
The Device Name and Serial Number can be changed in the General settings dialog box by editing the Camera<br />
Name: field. The Logical ID can be changed in the General settings dialog box by editing the Logical ID: field.<br />
Displaying Image Overlays<br />
Select any of the Image Overlays: options to set the type of information that is displayed over video.<br />
Overlay<br />
Camera Name<br />
Camera Location<br />
Playback Timestamp<br />
Description<br />
Displays the name assigned to the camera.<br />
Displays the location assigned to the camera.<br />
(Recorded video only) Displays the exposure timestamp for the video.<br />
Video Display Settings 79


