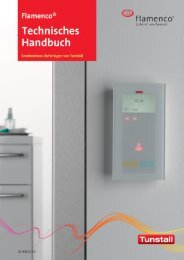
Flamenco Technical Manual Revision 6.0 - Tunstall.de
Flamenco Technical Manual Revision 6.0 - Tunstall.de
Flamenco Technical Manual Revision 6.0 - Tunstall.de
You also want an ePaper? Increase the reach of your titles
YUMPU automatically turns print PDFs into web optimized ePapers that Google loves.
Konfigurationsanleitung - Seite 1 - D Configuration Instructions - Page 1 - GB<br />
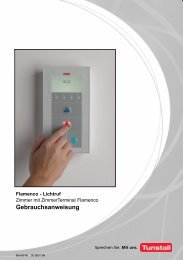
ComStation CT <strong>Flamenco</strong>, Best.‐Nr. 77 0606 00<br />
Terminal in Gegensprechtechnik, vorgesehen zur Tischaufstellung am Dienststützpunkt,<br />
inkl. roter Ruftaste, blauer Alarmtaste, grüner Anwesenheitstaste (AW1), gelber<br />
Anwesenheitstaste (AW2), 4 Funktionstasten mit situationsabhängiger Belegung, Mikrofon<br />
und Lautsprecher.<br />
Hinweis! Die vollständige Installation <strong>de</strong>s Systems ist im technischen<br />
Handbuch beschrieben.<br />
Vorsicht! Lassen Sie die ComStation CT nicht auf eine harte Oberfläche fallen und<br />
setzen es auch nicht einem beträchtlichen Druck o<strong>de</strong>r Stoß aus. Die Bedienfront <strong>de</strong>r<br />
ComStation CT besteht aus Glas und kann brechen.<br />
ComStation CT <strong>Flamenco</strong>, or<strong>de</strong>r no. 77 0606 00<br />
Terminal with two-way speech communication, <strong>de</strong>signed for <strong>de</strong>sktop installation in the<br />
nurse station, incl. red call button, blue co<strong>de</strong> blue/cardiac alarm button, green presence<br />
button (staff 1), yellow presence button (staff 2), 4 function keys as soft keys, microphone<br />
and loudspeakers.<br />
Note! The complete installation of the system is <strong>de</strong>scribed in the technical<br />
manual.<br />
Caution! The operating front cover of the ComStation CT is ma<strong>de</strong> of glass. Handle<br />
with care! The glass could break if it is dropped on a hard surface or receives a<br />
substantial impact.<br />
1. Konfigurationsmenü starten 1. Start configuration menu<br />
Funktionstaste ganz links und Funktionstaste ganz rechts gleichzeitig so lange (3 Sek.) Press the left and right function keys simultaneously (3 sec.) until the configuration<br />
gedrückt halten, bis das Konfigurationsmenü im Display erscheint.<br />
menu is shown in the display.<br />
Funktionstasten<br />
Function keys<br />
Symbole im Konfigurationsmenü:<br />
= Kreistaste = Markierten Menüpunkt einstellen (und speichern)<br />
= Pfeiltaste nach oben = In <strong>de</strong>r Liste nach oben wan<strong>de</strong>rn<br />
= Pfeiltaste nach unten = In <strong>de</strong>r Liste nach unten wan<strong>de</strong>rn<br />
= Haustaste = Abbrechen, d.h. zur höheren Menüebene<br />
zurückkehren ohne zu speichern.<br />
Symbols in the configuration menu:<br />
= Circle key = Set (and store) marked menu item<br />
= Upwards arrow key = Scroll upwards through the list<br />
= Downwards arrow key = Scroll downwards through the list<br />
= Home key = Cancel, go back to the higher menu level<br />
without storing<br />
<strong>Tunstall</strong> GmbH, Orkotten 66, D-48291 Telgte, www.tunstall.<strong>de</strong><br />
Menüpunkt Be<strong>de</strong>utung<br />
Sprache Sprache <strong>de</strong>r Displaytexte einstellen, z.B. Deutsch o<strong>de</strong>r Englisch.<br />
RAN RAN Anzahl: Anzahl Zimmergeräte (= RAN Anzahl) einstellen.<br />
Test RAN: Test, ob Zimmergeräte funktionsbereit sind und korrekt am RAN<br />
angeschlossen sind.<br />
Status: Prüfung, ob eingestellte RAN Anzahl mit Anzahl funktionsbereiter<br />
Zimmergeräte übereinstimmt.<br />
Adresse Zimmer‐Adresse einstellen (1 bis 110 einstellbar)<br />
Reinigungszeit Sekun<strong>de</strong>n einstellen, die benötigt wer<strong>de</strong>n um die Front <strong>de</strong>r ComStation CT<br />
abzuwischen<br />
Kontrast Kontrast <strong>de</strong>s ComStation CT ‐Displays auf hoch o<strong>de</strong>r niedrig einstellen<br />
Tastenton Ton bei Drücken <strong>de</strong>r Tasten an <strong>de</strong>r ComStation CT ein‐ o<strong>de</strong>r ausschalten<br />
Störungston Lautstärke <strong>de</strong>s Tons beim Auftreten von Störungen einstellen<br />
Info<br />
Version <strong>de</strong>r Software in <strong>de</strong>r ComStation CT anzeigen lassen.<br />
Audio Test Menüpunkt nur zur Verwendung durch <strong>Tunstall</strong>‐Techniker<br />
Tastenfunktion Funktion <strong>de</strong>r Alarmtaste und <strong>de</strong>r Anwesenheitstasten an <strong>de</strong>r ComStation CT<br />
ein‐ o<strong>de</strong>r ausschalten (Ein = Standar<strong>de</strong>instellung)<br />
Reset Verwendung nur durch <strong>Tunstall</strong>‐Techniker. (ComStation CT neu starten)<br />
Menu Item Meaning<br />
Language Selecting the user language (e.g. English or German).<br />
RAN RAN number: Setting of number of room <strong>de</strong>vices (= RAN number).<br />
Test RAN: Test if room <strong>de</strong>vices are ready to operate and if they are<br />
correctly connected to the RAN.<br />
Status: Check whether the stored RAN number is equal to the number<br />
of operational room <strong>de</strong>vices.<br />
Address Setting of room address (1 until 110 available)<br />
Cleaning time Setting the time (seconds) how long it takes to clean (wipe) the front<br />
of the ComStation CT<br />
Contrast Setting the display contrast to “high” or “low”.<br />
Key sound Switching the key sound on or off (on = recommen<strong>de</strong>d)<br />
Fault tone Setting the fault tone volume to soft, medium, loud or off.<br />
Info<br />
Displaying the ComStation's software version.<br />
Audio Test Function use only for <strong>Tunstall</strong> technicians.<br />
Key Function Switching on or of the function of Alarm Key, Presence Key 1 and<br />
Presence Key 2 (On = standard setting).<br />
Reset Function use only for <strong>Tunstall</strong> technicians. (Restart the ComStation CT )<br />
2. Zwingend erfor<strong>de</strong>rliche Einstellungen 2. Entering of necessary settings<br />
Sprache einstellen (wenn Menüpunkt vorhan<strong>de</strong>n)<br />
Selecting the user language (if the menu item is available)<br />
Mit <strong>de</strong>n Pfeiltasten “Sprache” markieren; dann Kreistaste drücken.<br />
Mark ”Language” using the arrow keys. Then press the circle key.<br />
Mit <strong>de</strong>n Pfeiltasten gewünschte Sprache markieren: D = Deutsch, GB = Englisch, E =<br />
Spanisch, F = Französisch, NL = Nie<strong>de</strong>rländisch, I = Italienisch. “Selbst<strong>de</strong>finiert” = eine<br />
weitere Sprache, wenn diese mit <strong>de</strong>r SystemOrganizer‐Software hinterlegt wur<strong>de</strong>.<br />
Mark the <strong>de</strong>sired language using the arrow keys: D = German; GB = English; E = Spanish;<br />
F = French; NL = Dutch; I = Italian. “Custom” = another language, if this is stored<br />
using the SystemOrganizer software.<br />
Kreistaste drücken, um markierte Sprache zu speichern.<br />
Press the circle key to store the marked language.<br />
RAN Anzahl einstellen (0 - 30)<br />
RAN Anzahl = Anzahl Zimmergeräte (Taster, Steckvorrichtungen, Zimmerleuchten etc.), die<br />
über RAN angeschlossen sind (Kein Birntaster, keine PBK Hand).<br />
Achtung, Ausnahme! Eine 4‐teilige Zimmerleuchte (Best.‐Nr. 77 0170 10 o<strong>de</strong>r 77 0171 10)<br />
gilt als zwei Zimmergeräte.<br />
Mit <strong>de</strong>n Pfeiltasten “RAN” markieren; dann Kreistaste drücken.<br />
Mit <strong>de</strong>n Pfeiltasten “RAN Anzahl” markieren; dann Kreistaste drücken.<br />
Mit <strong>de</strong>n Pfeiltasten RAN‐Anzahl <strong>de</strong>s Zimmers markieren.<br />
Kreistaste drücken, um die markierte RAN‐Anzahl zu speichern.<br />
Zimmer-Adresse einstellen (1 - 110)<br />
Mit <strong>de</strong>n Pfeiltasten “Adresse” markieren; dann Kreistaste drücken.<br />
Mit <strong>de</strong>n Pfeiltasten gewünschte Adresse markieren.<br />
Kreistaste drücken, um die markierte Adresse zu speichern.<br />
Reinigungszeit einstellen (10 – 30 Sekun<strong>de</strong>n)<br />
Die Reinigungszeit legt fest, wie lange die Tasten <strong>de</strong>r ComStation CT außer Funktion sind,<br />
nach<strong>de</strong>m die Taste Clean gedrückt wur<strong>de</strong> (Zeit zum Abwischen <strong>de</strong>r Bedienfront).<br />
Mit <strong>de</strong>n Pfeiltasten “Reinigungszeit” markieren; dann Kreistaste drücken.<br />
Mit <strong>de</strong>n Pfeiltasten gewünschte Reinigungszeit (in Sekun<strong>de</strong>n) markieren.<br />
Kreistaste drücken, um markierte Reinigungszeit zu speichern.<br />
Setting of RAN number (0 - 30) (Room Area Network)<br />
RAN number = Number of <strong>de</strong>vices in the room (switches, connection sockets, room lamps,<br />
etc.) which are connected via RAN. (No pear push switch, no patient handset). Attention,<br />
exception! One room lamp with 4 sections (or<strong>de</strong>r no. 77 0170 10 or 77 0171 10) is<br />
equivalent to two room <strong>de</strong>vices.<br />
Mark “RAN” using the arrow keys. Then press the circle key.<br />
Mark “RAN number” using the arrow keys. Then press the circle key.<br />
Mark the <strong>de</strong>sired room number for the room using the arrow keys.<br />
Press the circle key to store the marked address.<br />
Setting of room address (1 - 110)<br />
Mark “Address” using the arrow keys. Then press the circle key.<br />
Mark the <strong>de</strong>sired room address using the arrow keys.<br />
Press the circle key to store the marked address.<br />
Setting of cleaning time (10 – 30 seconds)<br />
The cleaning time <strong>de</strong>fines how long the ComStation CT keys are not operational after the<br />
Clean key has been pressed (time for wiping the front).<br />
Mark “Cleaning time” using the arrow keys. Then press the circle key.<br />
Mark the <strong>de</strong>sired cleaning time using the arrow keys.<br />
Press the circle key to store the marked cleaning time.<br />
74 0452 30<br />
Steckvorrichtung ComStation<br />
Connection socket ComStation<br />
77 0606 00<br />
ComStation CT <strong>Flamenco</strong> ®<br />
00 8801 74, 06/10 (Rev. 1.0)<br />
Page 139


