Tweaking Optimizing Windows.pdf - GEGeek
Tweaking Optimizing Windows.pdf - GEGeek
Tweaking Optimizing Windows.pdf - GEGeek

Create successful ePaper yourself
Turn your PDF publications into a flip-book with our unique Google optimized e-Paper software.
Read memory size from SPD (Serial Presence Detect) chip on the memory DIMM<br />
Eliminate logo delays (inserted by most manufacturers)<br />
You should enable this feature for faster booting. But if you make any hardware changes, it is recommended that you disable this<br />
feature so that the BIOS can run full diagnostic tests to detect any problems that may slip through the abbreviated testing scheme<br />
offered by this feature. After a few error-free test runs, you can reenable this feature for faster booting without impairing system<br />
stability.<br />
Quick power on self test<br />
When enabled, this feature will skip or shorten some of the system tests that are performed during the booting up process. This<br />
allows the system to boot up much quicker. You should enable this feature for faster booting. But if you make any hardware<br />
changes, it is recommended that you disable this feature so that the BIOS can run full diagnostic tests to detect any problems that<br />
may slip through the abbreviated testing scheme offered by this feature. After a few error-free test runs, you can reenable this<br />
feature for faster booting without impairing system stability.<br />
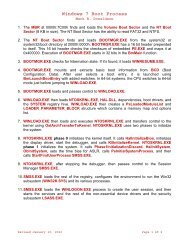
Second boot device<br />
This feature allows you to select the second device from which the BIOS will attempt to load an operating system. If the BIOS finds<br />
and loads an operating system from the device selected through this feature, it won't load another operating system, even if you<br />
have one on a different device. For example, if you set Floppy as the first boot device and HDD-0 as the second boot device, the<br />
BIOS will boot straight into the <strong>Windows</strong> 98 installation on your hard disk and ignore the <strong>Windows</strong> XP installation CD in your CD-<br />
ROM drive if there's no bootable disk in the floppy drive. In short, this feature allows you to choose the second device to boot from.<br />
By default, HDD-0 is the second boot device in practically all motherboards. But, unless you boot often from the floppy drive (which<br />
is often the first boot device), it is better to set your hard disk (HDD-0) as the first boot device. This will shorten the booting<br />
process because the BIOS no longer needs to check the floppy drive for a bootable operating system. More importantly, doing so<br />
prevents the BIOS from loading the wrong operating system in case you forgot to remove the boot disk from the floppy drive! This<br />
also indirectly prevents the loading of any virus infected floppy disk that was left in the drive during booting.<br />
Third boot device<br />
This feature allows you to select the third device from which the BIOS will attempt to load an operating system. If the BIOS finds<br />
and loads an operating system from the device selected through this feature, it won't load another operating system, even if you<br />
have one on a different device. For example, if you set Floppy as the first boot device, HDD-0 as the second boot device and SCSI<br />
as the third boot device, the BIOS will boot straight into the <strong>Windows</strong> 98 installation on your SCSI hard disk and ignore the <strong>Windows</strong><br />
XP installation CD in your CD-ROM drive if there's no bootable IDE hard disk or bootable floppy disk. In short, this feature allows<br />
you to choose the third device to boot from.<br />
GRAPHICS SUBSYSTEM<br />
AGP 2x mode<br />
This BIOS feature is found on AGP 2X-capable motherboards. When enabled, it allows the AGP bus to make use of the AGP 2X<br />
transfer protocol to boost the AGP bus bandwidth. If it's disabled, then the AGP bus will only use the standard AGP1X transfer<br />
protocol. The baseline AGP 1X protocol only makes use of the rising edge of the AGP signal for data transfer. This translates into a<br />
bandwidth of 264MB/s. But enabling AGP 2X Mode doubles that bandwidth by transferring data on both the rising and falling edges<br />
of the signal. Through this method, the effective bandwidth of the AGP bus is doubled even though the AGP clock speed remains at<br />
the standard 66MHz. This is the same method by which UltraDMA/33 derives its performance boost.<br />
The AGP 2X protocol must be supported by both the motherboard and graphics card for this feature to work. Of course, this feature<br />
will only appear in your BIOS if your motherboard supports the AGP 2X transfer protocol! So, all you need to do is make sure your<br />
graphics card supports AGP 2X transfers. If it does, enable AGP 2X Mode to take advantage of the faster transfer mode. Disable it<br />
only if you are facing stability issues or if you intend to overclock the AGP bus beyond 75MHz with sidebanding support enabled.<br />
Please note that doubling the AGP bus bandwidth through the AGP 2X transfer protocol won't double the performance of your AGP<br />
graphics card. The performance of the graphics card relies on far more than the bandwidth of the AGP bus. The performance boost<br />
is most apparent when the AGP bus is really stressed (i.e. during a texture-intensive game).<br />
AGP 4x drive strength<br />
This BIOS feature is similar to AGP Driving Control. It allows you to set whether to allow the AGP controller to dynamically adjust<br />
the AGP driving strength or to allow manual configuration by the BIOS. Due to the tighter tolerances of the AGP 4X bus, the AGP 4X<br />
controller features auto-compensation circuitry that compensate for the motherboard's impedance on the AGP bus. It does this by<br />
dynamically adjusting the drive strength of the I/O pads over a range of temperature and voltages when AGP 4X mode is selected.<br />
The auto-compensation circuitry has two operating modes. By default, it is set to automatically compensate for the impedance once<br />
or at regular intervals by dynamically adjusting the AGP drive strength. The circuitry can also be disabled or bypassed. In this case,<br />
it is up to the user (through the BIOS) to write the desired drive strength value to the AGP I/O pads. When you set this BIOS<br />
feature to Auto, the AGP drive strength values are obtained from the auto-compensation circuitry. Normally, this is the<br />
recommended setting as it allows the AGP controller to dynamically adjust for motherboard impedance changes. However, manual<br />
configuration of the AGP drive strength may be necessary.<br />
Some AGP 4X cards were not designed according to published AGP 4X signal impedance and routing guidelines. Therefore, these<br />
cards may not work reliably with the default drive strengths issued by the compensation circuit. To correct this problem, you can<br />
bypass the compensation circuit and force the AGP I/O pads to use a particular drive strength. Usually, this will be a higher than<br />
normal drive strength. You can also make use of this feature for overclocking purposes. Increasing the drive strength increases the<br />
stability of the AGP bus by reducing the impedance from the motherboard and boosting the signal strength. But be very, very<br />
circumspect when you increase the AGP drive strength on an overclocked AGP bus as your AGP card may be irreversibly damaged in<br />
the process!<br />
Therefore, for troubleshooting or overclocking purposes, you should set the AGP 4X Drive Strength to Manual. This allows you to<br />
manually set the AGP Drive Strength value via the AGP Drive Strength P Ctrl and AGP Drive Strength N Ctrl options. Note that this