Operator's Manual - Sirona - Technical Documentation
Operator's Manual - Sirona - Technical Documentation
Operator's Manual - Sirona - Technical Documentation
You also want an ePaper? Increase the reach of your titles
YUMPU automatically turns print PDFs into web optimized ePapers that Google loves.
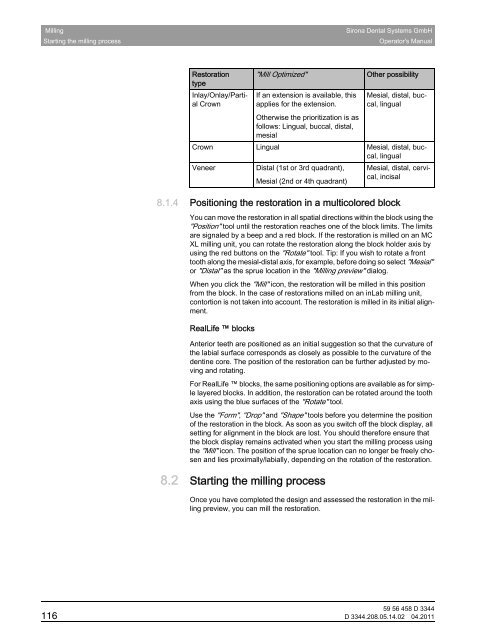
MillingStarting the milling process<strong>Sirona</strong> Dental Systems GmbH<strong>Operator's</strong> <strong>Manual</strong>CEREC tableRestorationtypeInlay/Onlay/PartialCrown"Mill Optimized"If an extension is available, thisapplies for the extension.Otherwise the prioritization is asfollows: Lingual, buccal, distal,mesialOther possibilityMesial, distal, buccal,lingualCrown Lingual Mesial, distal, buccal,lingualVeneerDistal (1st or 3rd quadrant),Mesial (2nd or 4th quadrant)Mesial, distal, cervical,incisal8.1.4 Positioning the restoration in a multicolored blockYou can move the restoration in all spatial directions within the block using the"Position" tool until the restoration reaches one of the block limits. The limitsare signaled by a beep and a red block. If the restoration is milled on an MCXL milling unit, you can rotate the restoration along the block holder axis byusing the red buttons on the "Rotate" tool. Tip: If you wish to rotate a fronttooth along the mesial-distal axis, for example, before doing so select "Mesial"or "Distal" as the sprue location in the "Milling preview" dialog.When you click the "Mill" icon, the restoration will be milled in this positionfrom the block. In the case of restorations milled on an inLab milling unit,contortion is not taken into account. The restoration is milled in its initial alignment.emptyRealLife blocksAnterior teeth are positioned as an initial suggestion so that the curvature ofthe labial surface corresponds as closely as possible to the curvature of thedentine core. The position of the restoration can be further adjusted by movingand rotating.For RealLife blocks, the same positioning options are available as for simplelayered blocks. In addition, the restoration can be rotated around the toothaxis using the blue surfaces of the "Rotate" tool.Use the "Form", "Drop" and "Shape" tools before you determine the positionof the restoration in the block. As soon as you switch off the block display, allsetting for alignment in the block are lost. You should therefore ensure thatthe block display remains activated when you start the milling process usingthe "Mill" icon. The position of the sprue location can no longer be freely chosenand lies proximally/labially, depending on the rotation of the restoration.8.2 Starting the milling processIntroductionOnce you have completed the design and assessed the restoration in the millingpreview, you can mill the restoration.59 56 458 D 3344116 D 3344.208.05.14.02 04.2011


